Projects
A project is logical grouping of workloads and artifacts within a tenant. Projects are used to group jobs for training and batch inference as well as endpoints for deployment. Jobs and endpoints are created from a project window, which assigns the job or endpoint to that project. You can fine-tune existing models by creating a new training job. You can generate predictions from your models on your data by deploying it to an endpoint. Or, you can generate predictions on bulk data by creating a batch inference job. Creating a project is typically the first step of a workflow.
|
It’s important to understand the difference between a project and a tenant.
|
This document describes how to:
Create a project using the GUI
Follow the steps below to create a project using the GUI.
-
Click Projects from the left menu to view the Projects window.
-
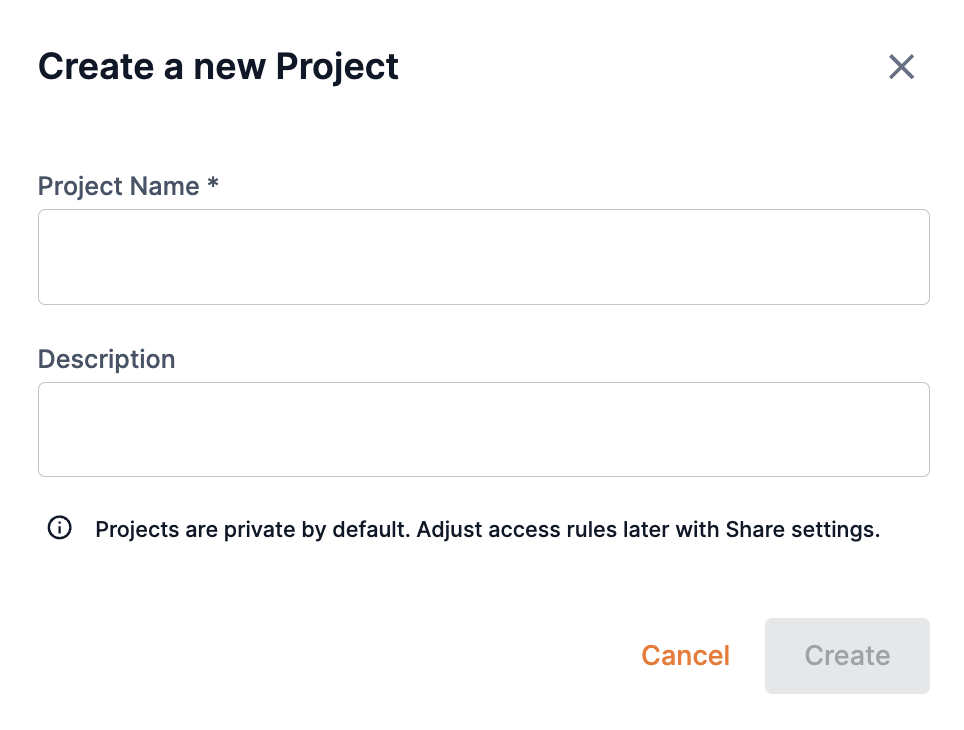
Click New project. The Create a new Project window will open.
-
Enter a name to be used into Project name field.
-
Add a brief description into the Description field.
-
Click Create to proceed with creating your project.
Create a project using the CLI
Create a project by using the snapi project create command, as shown in the example below. The command specifies user-workflows as the project name.
$  snapi project create \
--project user-workflows|
Run snapi project create --help to display additional usage and options. |
Project share settings
Providing access to projects and their artifacts (associated jobs and endpoints) within SambaStudio is accomplished by assigning a share role in the Share settings window. Access to projects and their artifacts can be assigned by the owner/creator of the project (a User), tenant administrators (TenantAdmin) to projects within their tenant, and organization administrators (OrgAdmin) to projects across all tenants.
From a project window, click the share icon to open the Share settings window.
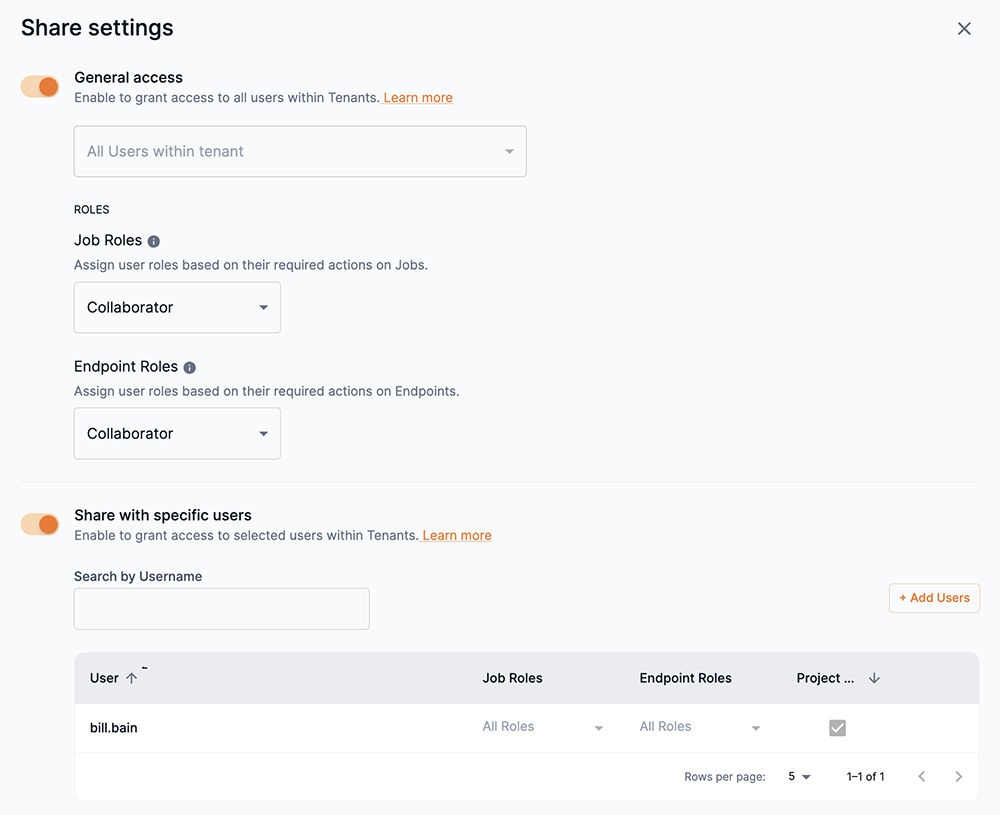
The Share settings window is divided into two sections, General access and Share with specific users. Slide the toggle to the right to enable and define the share settings for either section. This allows the access to projects and their artifacts to be defined and regulated based on the criteria described below.
General access
You can provide access to a project and its artifacts (associated jobs and endpoints) based on the users in tenants. Once you have defined the general access to your project, you can set access to a project’s associated jobs and endpoints based on the share roles of Viewer or Collaborator.
- Viewer
-
A Viewer has the most restrictive access to SambaStudio artifacts. Viewers are only able to consume and view artifacts assigned to them. Viewers cannot take actions that affect the functioning of an artifact assigned to them.
- Collaborator
-
Collaborators have more access to artifacts than Viewers. A Collaborator can edit and manipulate the information of artifacts assigned to them. As such, a Collaborator can affect the functioning of an artifact assigned to them.
|
Hover over the info icon to view the actions available for Viewer and Collaborator share roles of jobs and endpoints. 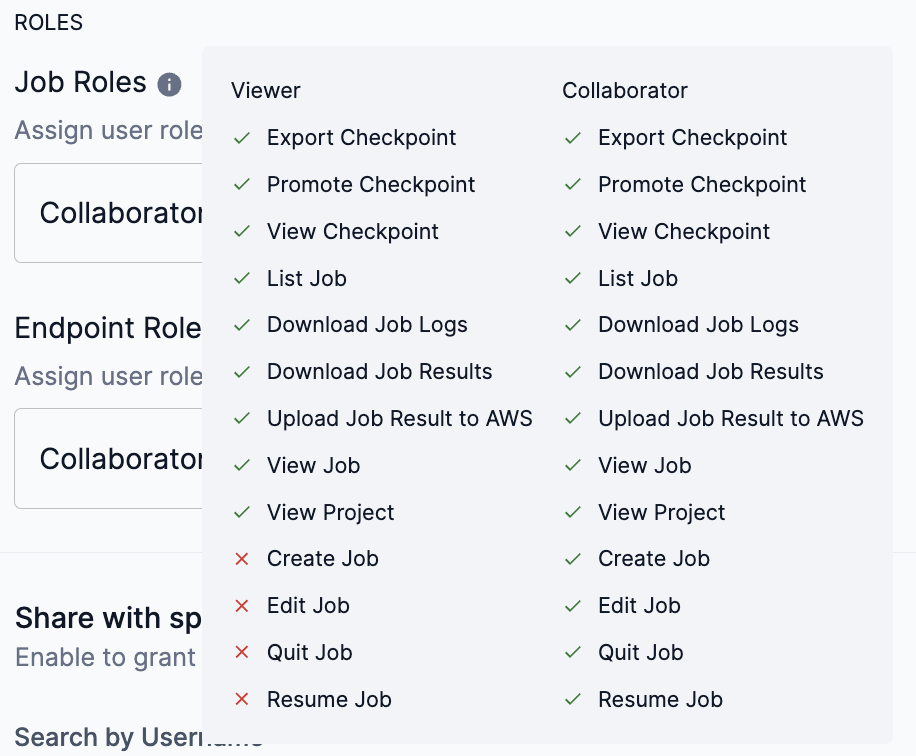
Figure 4. Job share roles actions
|
-
Slide the toggle to the right to enable General access to the project.
-
Only users from within the same tenant as the project can be granted access to a project.
-
If a user is removed from the tenant after being granted access to a project, they will loose access to the project.
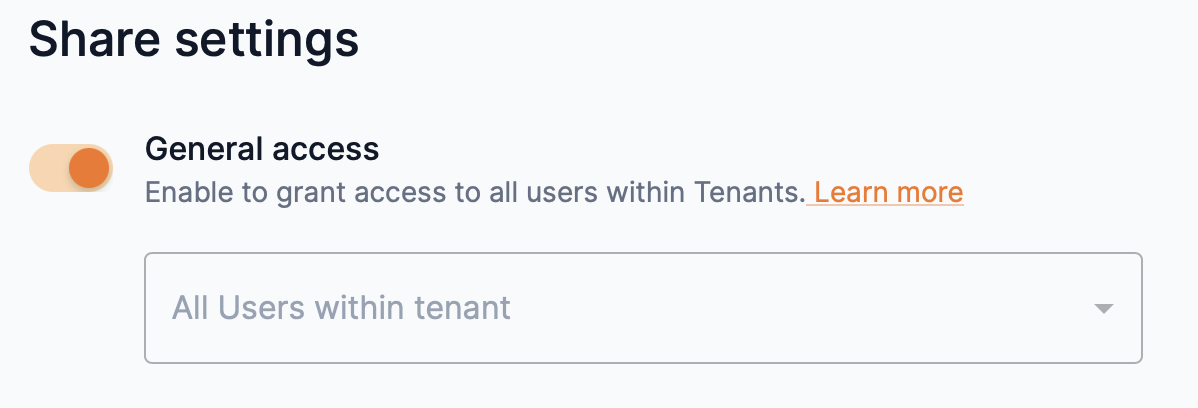 Figure 5. Project general access
 -
-
Select an option of Viewer, Collaborator, or No access from the Job roles or Endpoint roles drop-down to set the access to it.
-
Access to jobs and endpoints can be set independently of each other.
-
No access forbids access to the job or endpoint of the project.
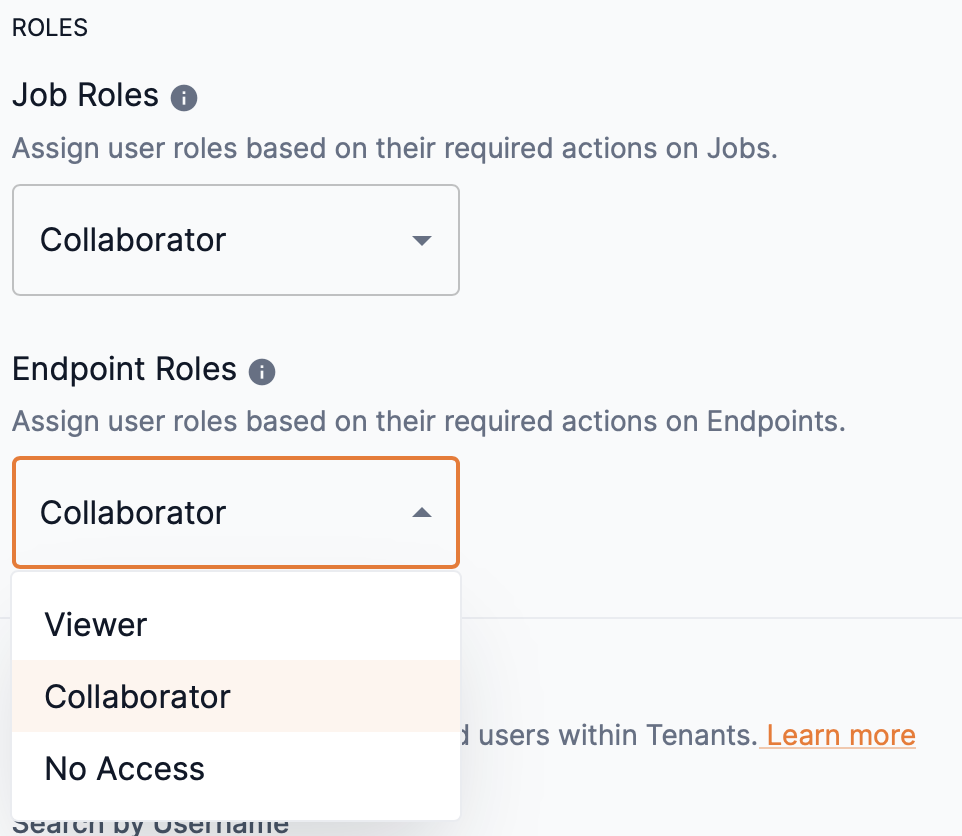 Figure 6. Job and endpoint roles drop-down
-
-
Click Save at the bottom of the Share settings window to update your General access share settings.
 Figure 7. Share settings save
Disable general access
-
To disable general access to a project and its artifacts (associated jobs and endpoints) in all tenants throughout the platform, slide the General access toggle to the left.
 Figure 8. Disable general access
 -
Click Save at the bottom of the Share settings window to update your General access share settings.
Figure 9. Share settings save
Share with specific users
Specific users can be set as Viewer or Collaborator and allowed access to the jobs and endpoints of a project based on the rights of each share role. Additionally, No access can be set for specific users. Follow the steps below to send an invitation to users and set their share role access.
|
OrgAdmin and TenantAdmin user roles have access to projects based on their rights and cannot be assigned a different share role. |
-
Slide the Share with specific users toggle to the right to enable and define user access for the project.
-
Click Add users to open the Add new users box.
-
From the Usernames drop-down, select the user(s) for which you wish to share your project. You can type an input to locate the user. Multiple usernames can be selected.
-
You can remove a user added to the drop-down by clicking the X next to their name or by setting the cursor and pressing delete.
-
-
Select an option of Viewer, Collaborator, or No access from the Job roles or Endpoint roles drop-down to set the access to it.
-
Hover over the info icon to view the actions available for Viewer and Collaborator share roles of jobs and endpoints.
-
-
Click Add users to close the Add new users box.
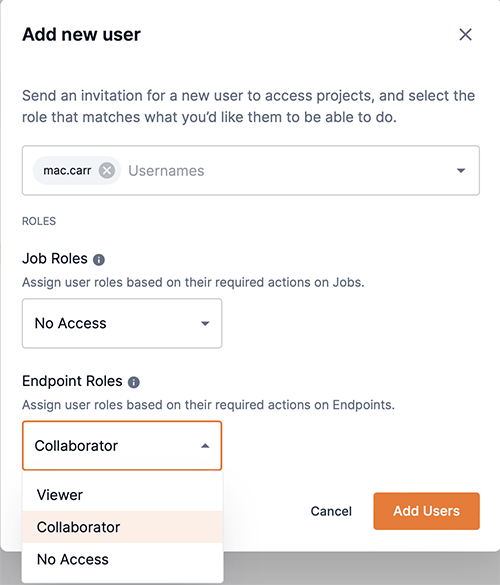 Figure 10. Add new user
 -
You can assign a user as an owner of the project by selecting the box in the Project owner column.
-
An owner inherits the actions of all roles. Setting a user as an owner overrides previous role settings.
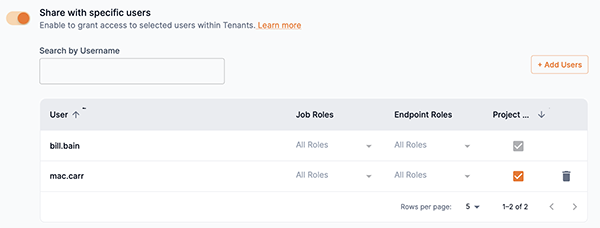 Figure 11. Assign user as project owner
-
-
Click Save at the bottom of the Share settings window to send the invitation to your selected users and update your share settings.
Figure 12. Share settings save
Remove users
You can remove a user that you have shared your project with for all users or for specific users.
- Remove sharing for all users
-
-
To remove share access to your project for all users, slide the Share with specific users toggle to the left to disable sharing.
 Figure 13. Disable share with specific users toggle
 -
Click Save at the bottom of the Share settings window to update your share settings.
Figure 14. Share settings save
-
- Remove sharing for a specific user
-
-
From the Share with specific users list, click the trash icon next to the user you wish to stop sharing your project.
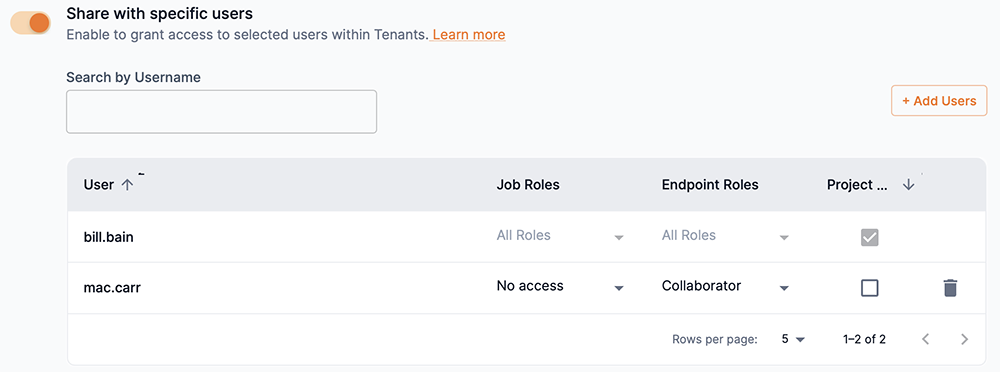 Figure 15. Remove user from share list
 -
Click Save at the bottom of the Share settings window to update your share settings.
Figure 16. Share settings save
-
View, edit, or delete a project using the GUI
Follow the steps below to view, edit, or delete an existing project.
-
Navigate to the Projects window to view the current projects. The Projects window can be viewed by selecting Projects from the left menu.
-
Projects are displayed in a multi-column table.
-
Name displays the project name.
-
Description displays the project description, if inputted.
-
Jobs displays the number of jobs associated with the project.
-
Endpoints displays the number of endpoints associated with the project.
-
Status displays the status of the project. For example, Deleting will display when the project is in the process of being deleted from the platform.
-
Creation displays the creation timestamp of the project.
-
Owner displays the owner of the project.
-
-
-
Click the kebob menu (three dots) to display the drop-down menu and available actions for the selected project.
-
Click View project from the drop-down to go to the selected project’s window. Alternatively, you can select the project directly to go to its project window.
-
From the selected project’s window you can view its jobs and endpoints.
-
From the selected project’s window you can create a new training job, a new batch inference job, or a new endpoint to be associated with the project.
-
-
Click Edit from the drop down. The Edit your project window will open. Edit the existing Project name or Description and click Save and close to confirm your edits.
-
Click Cancel to stop the editing process and return to the projects table.
-
-
Click Delete from the drop-down.
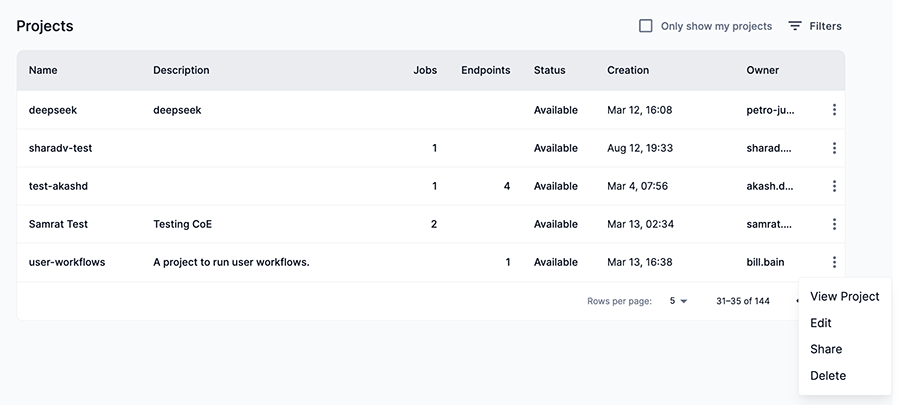 Figure 17. Projects window
-
Click Yes from the confirmation screen to delete the project. Click Cancel to close the window.
-
-
|
Deleting a project deletes all checkpoints and jobs associated with the project. |
View the project list using the CLI
The snapi project list command can be used to view a list of the current projects in the platform.
$  snapi project list
NAME                    CREATED AT                     LAST UPDATED
SNAPI_0304              03/04/2023 07:54:47 PST        03/04/2023 07:54:47 PST
UI_0306                 03/06/2023 06:34:35 PST        03/06/2023 06:34:35 PST
SNAPI 03/06/2023 10:59:43 PST 03/06/2023 10:59:43 PST|
Run snapi project list --help to display additional usage and options. |
View the jobs and endpoints of a project
You can view the jobs and endpoints associated with a project using the GUI or CLI. Follow the instructions described in the corresponding section to learn how.
View jobs and endpoints of a project using the GUI
-
From the Projects list table, click the project you wish to view.
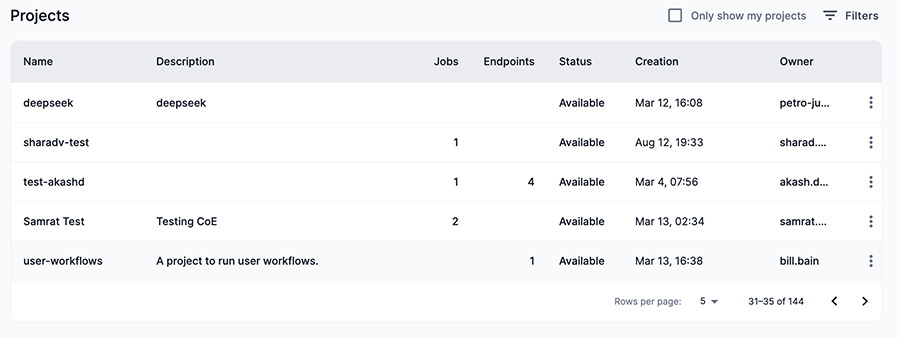 Figure 18. Projects list table
 -
The Project window will open displaying its associated jobs and endpoints in multi-column tables.
The Monitoring column in the Endpoints table provides a link to the Grafana monitoring dashboard. Click the corresponding icon to open the dashboard for that endpoint.
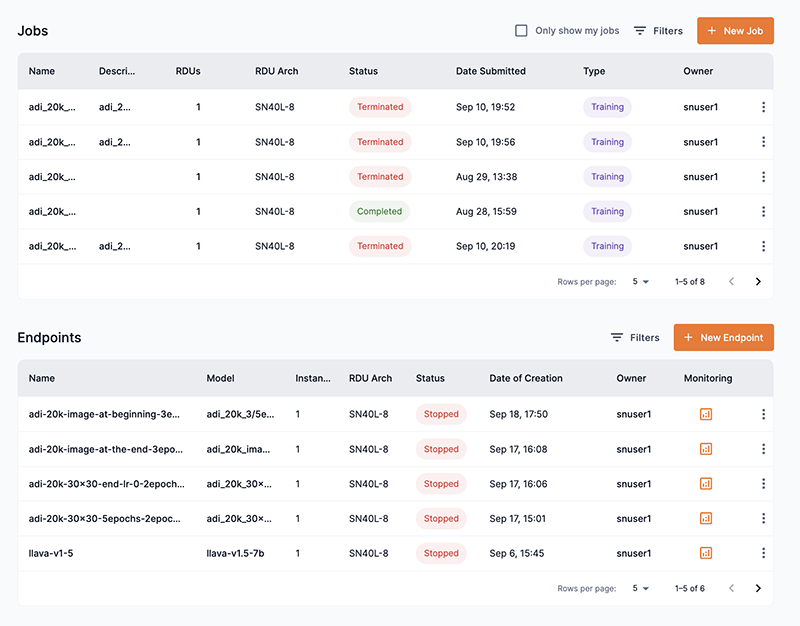 Figure 19. A project’s jobs and endpoints
 -
Click a job or endpoint to view its detail window.
View jobs of a project using the CLI
Use the snapi job list command to view the associated jobs of a project, as demonstrated in the example below. You will need to specify the project name or ID for the --project input.
$  snapi job list \
    --project <project-name-or-id>

13b_job_train1
============
Name               : 13b_job_train1
Type               : train
Project ID         : 39db253a-63db-45c3-b2af-4265cf397361
Status : EXIT_WITH_0|
Run snapi job list --help to display additional usage and options. |
View endpoints of a project using the CLI
Use the snapi endpoint list command to view the associated endpoints of a project, as demonstrated in the example below. You will need to specify the project name or ID for the --project input.
$  snapi endpoint list \
      --project <project-name-or-id>

13b-v2-ep1
==========
ID             : d23bfb9d-6643-4fb9-b11c-502893479ab5
Name           : 13b-v2-ep1
Description    :
Project ID     : 39db253a-63db-45c3-b2af-4265cf397361
ML App         : Generative Tuning 13B
Model          : GPT_13B_Generic_Instruction_Tuning_v2
Instances      : 1
URL            : <path-to-endpoint>
API Key        : <generated-api-key>
Status         : Stopped
Created at     : 2023-05-22T15:02:06.945712+00:00
Last Updated   : 2023-05-23T23:15:59.053498+00:00
API Keys       : [{'endpoint_id': 'd23bfb9d-6643-4fb9-b11c-502893479ab5', 'time_updated': '2023-11-10T16:44:14.271349+00:00', 'id': 'efdef074-8211-4252-83d5-8c1919a4645f', 'description': 'First Key', 'status': 'Live', 'time_created': '2023-11-10T16:44:14.271349+00:00', 'user_id': 'tharakar', 'api_key': '<generated-api-key>'}]
Hyperparams : None|
Run snapi endpoint list --help to display additional usage and options. |