Prerequisites
Before starting, ensure you have:- A SambaCloud account and API key
- Node.js 18 or later (if installing via npm)
Installation and setup
1
Install OpenCode
- curl
- npm
2
Open the web UI
3
Add a custom provider
Go to Settings > Providers and click to add a new custom provider.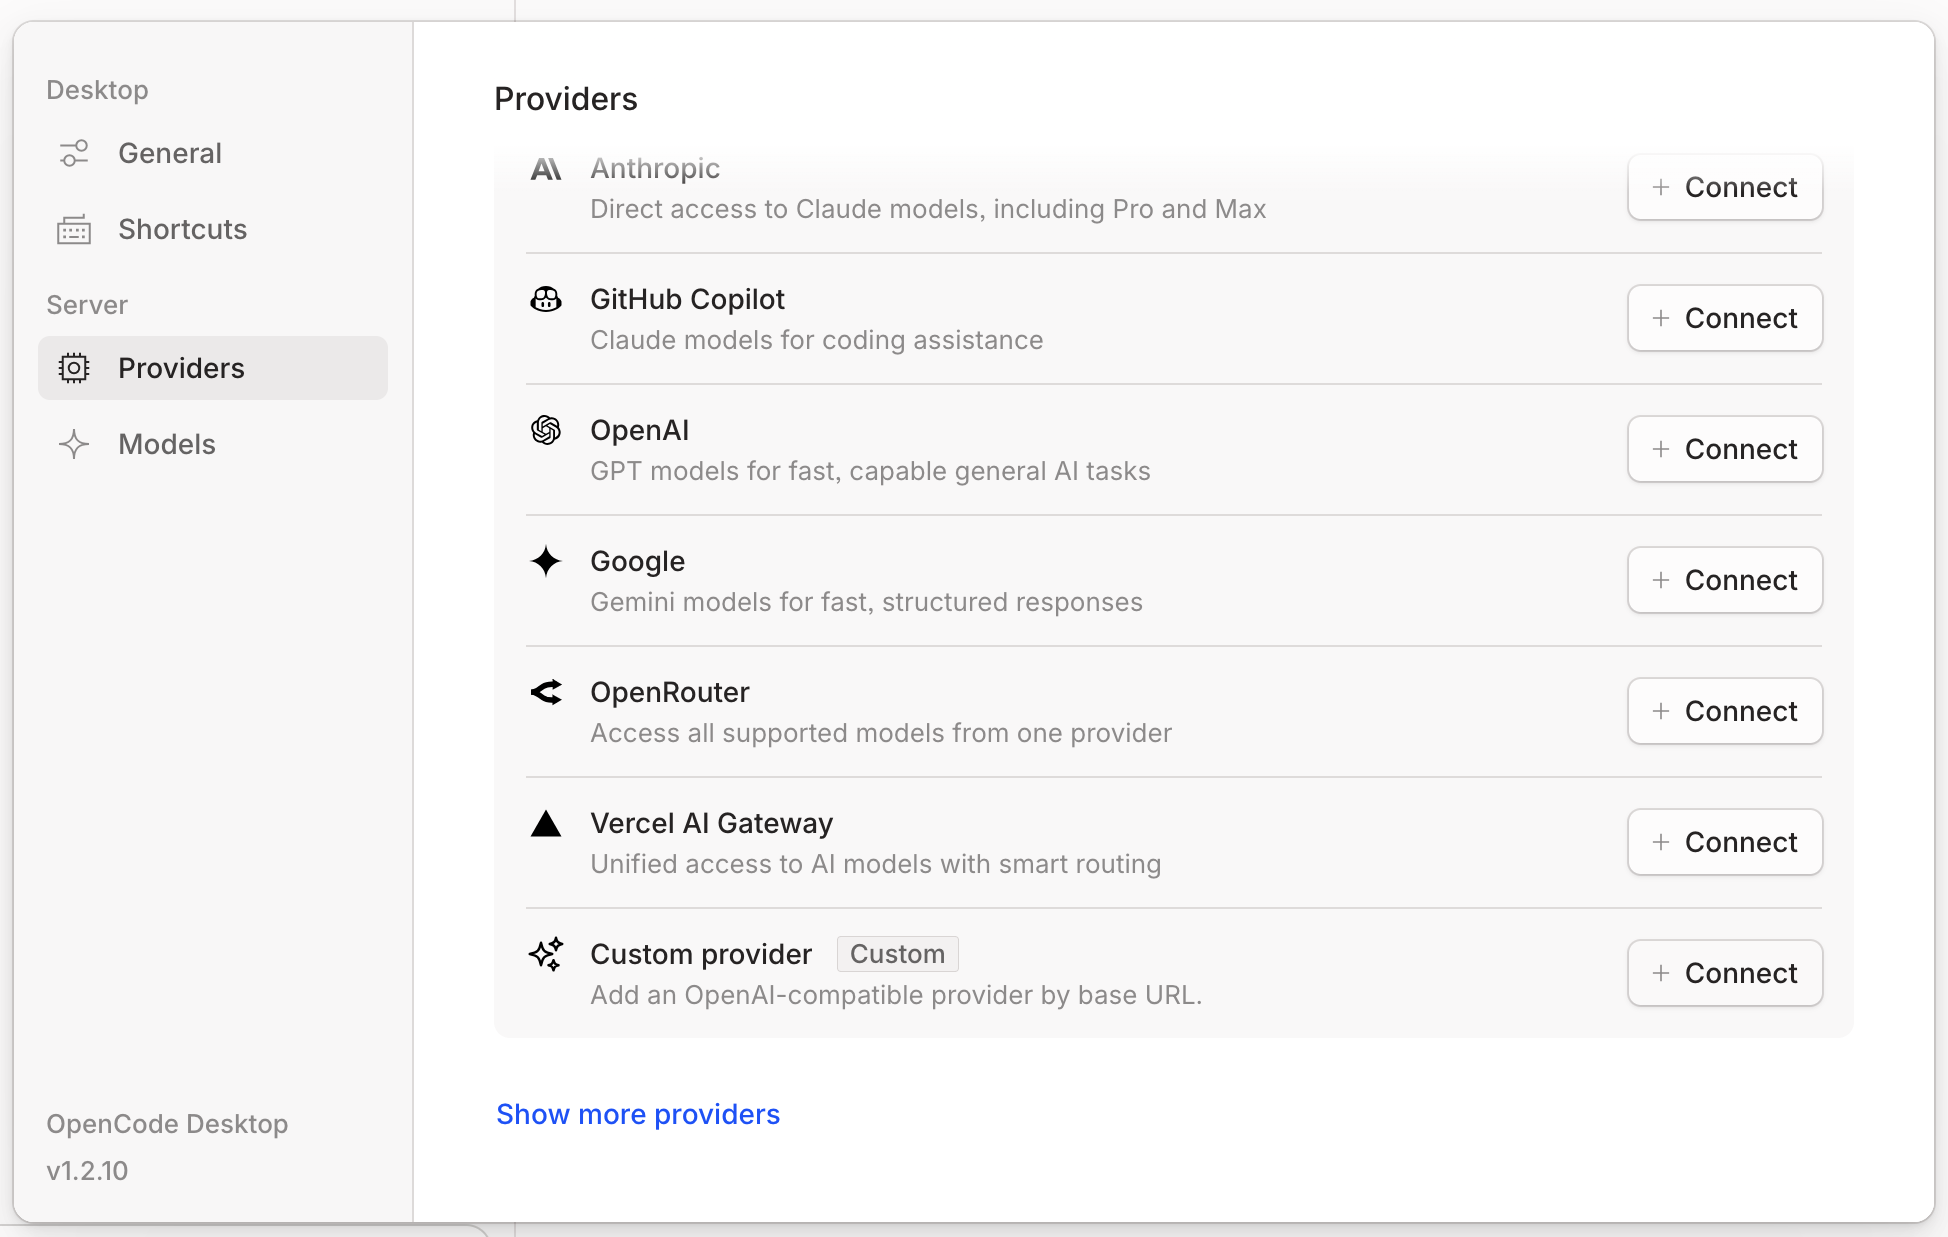
4
Configure SambaNova credentials
Enter the following details: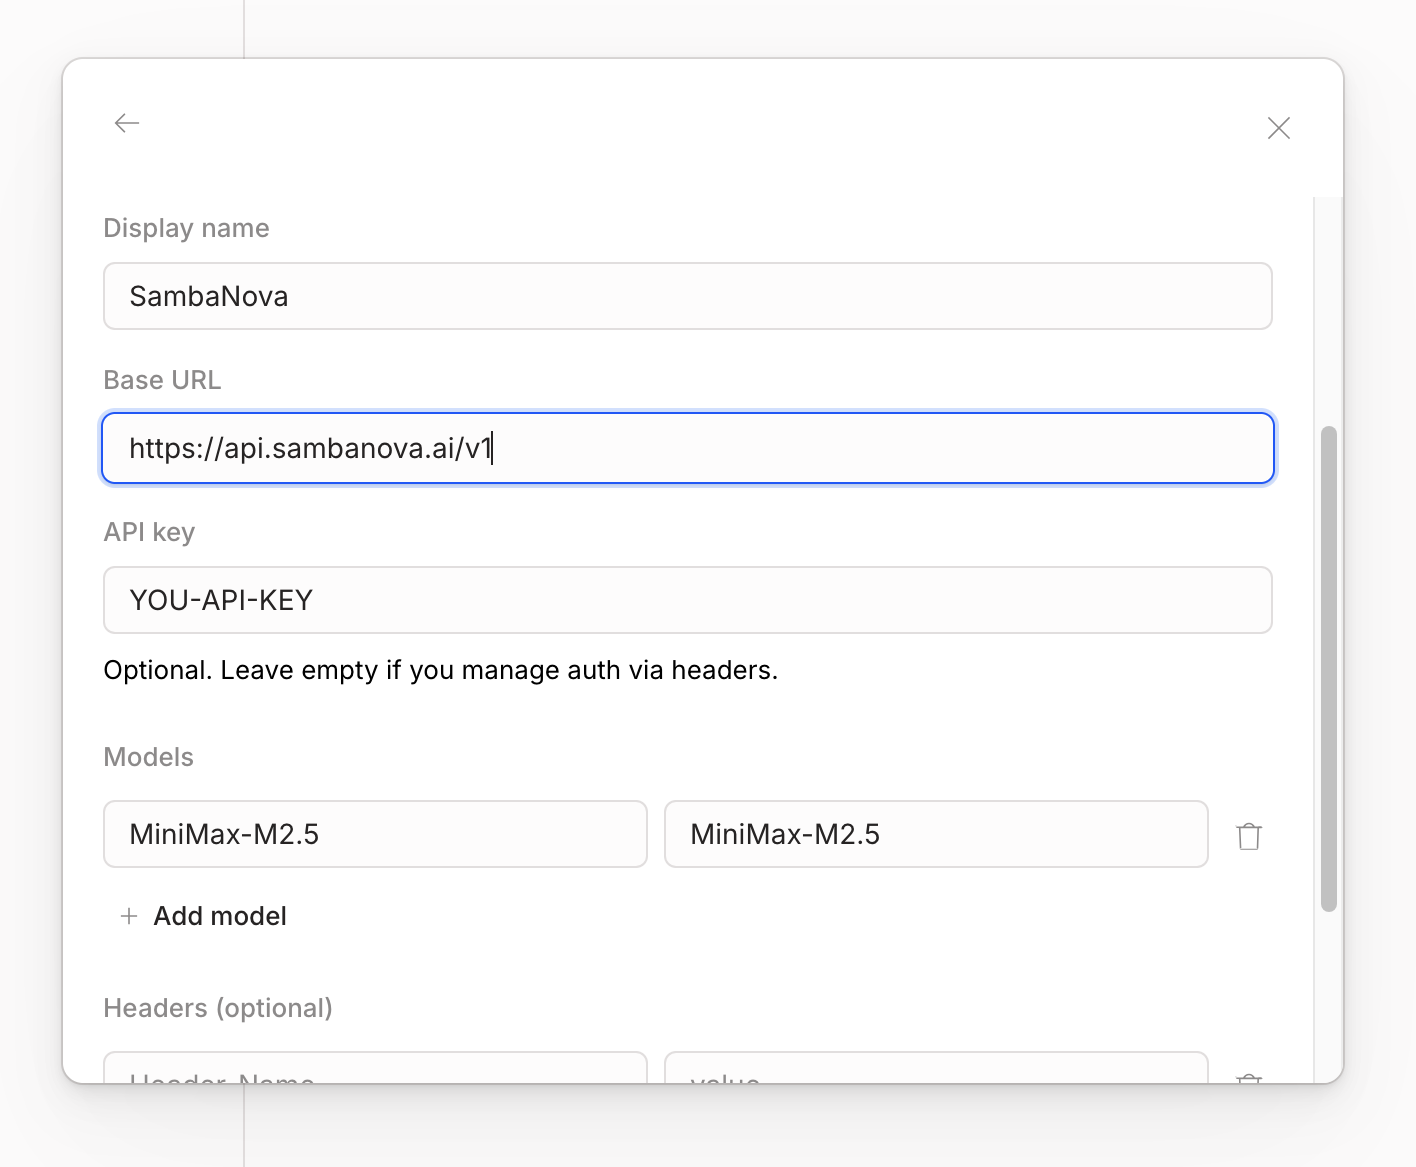
- URL:
https://api.sambanova.ai/v1 - API Key: Your SambaCloud API key
- Model Name: For example,
MiniMax-M2.7
5
Start using SambaNova models
You can now use SambaNova models in your OpenCode workflows.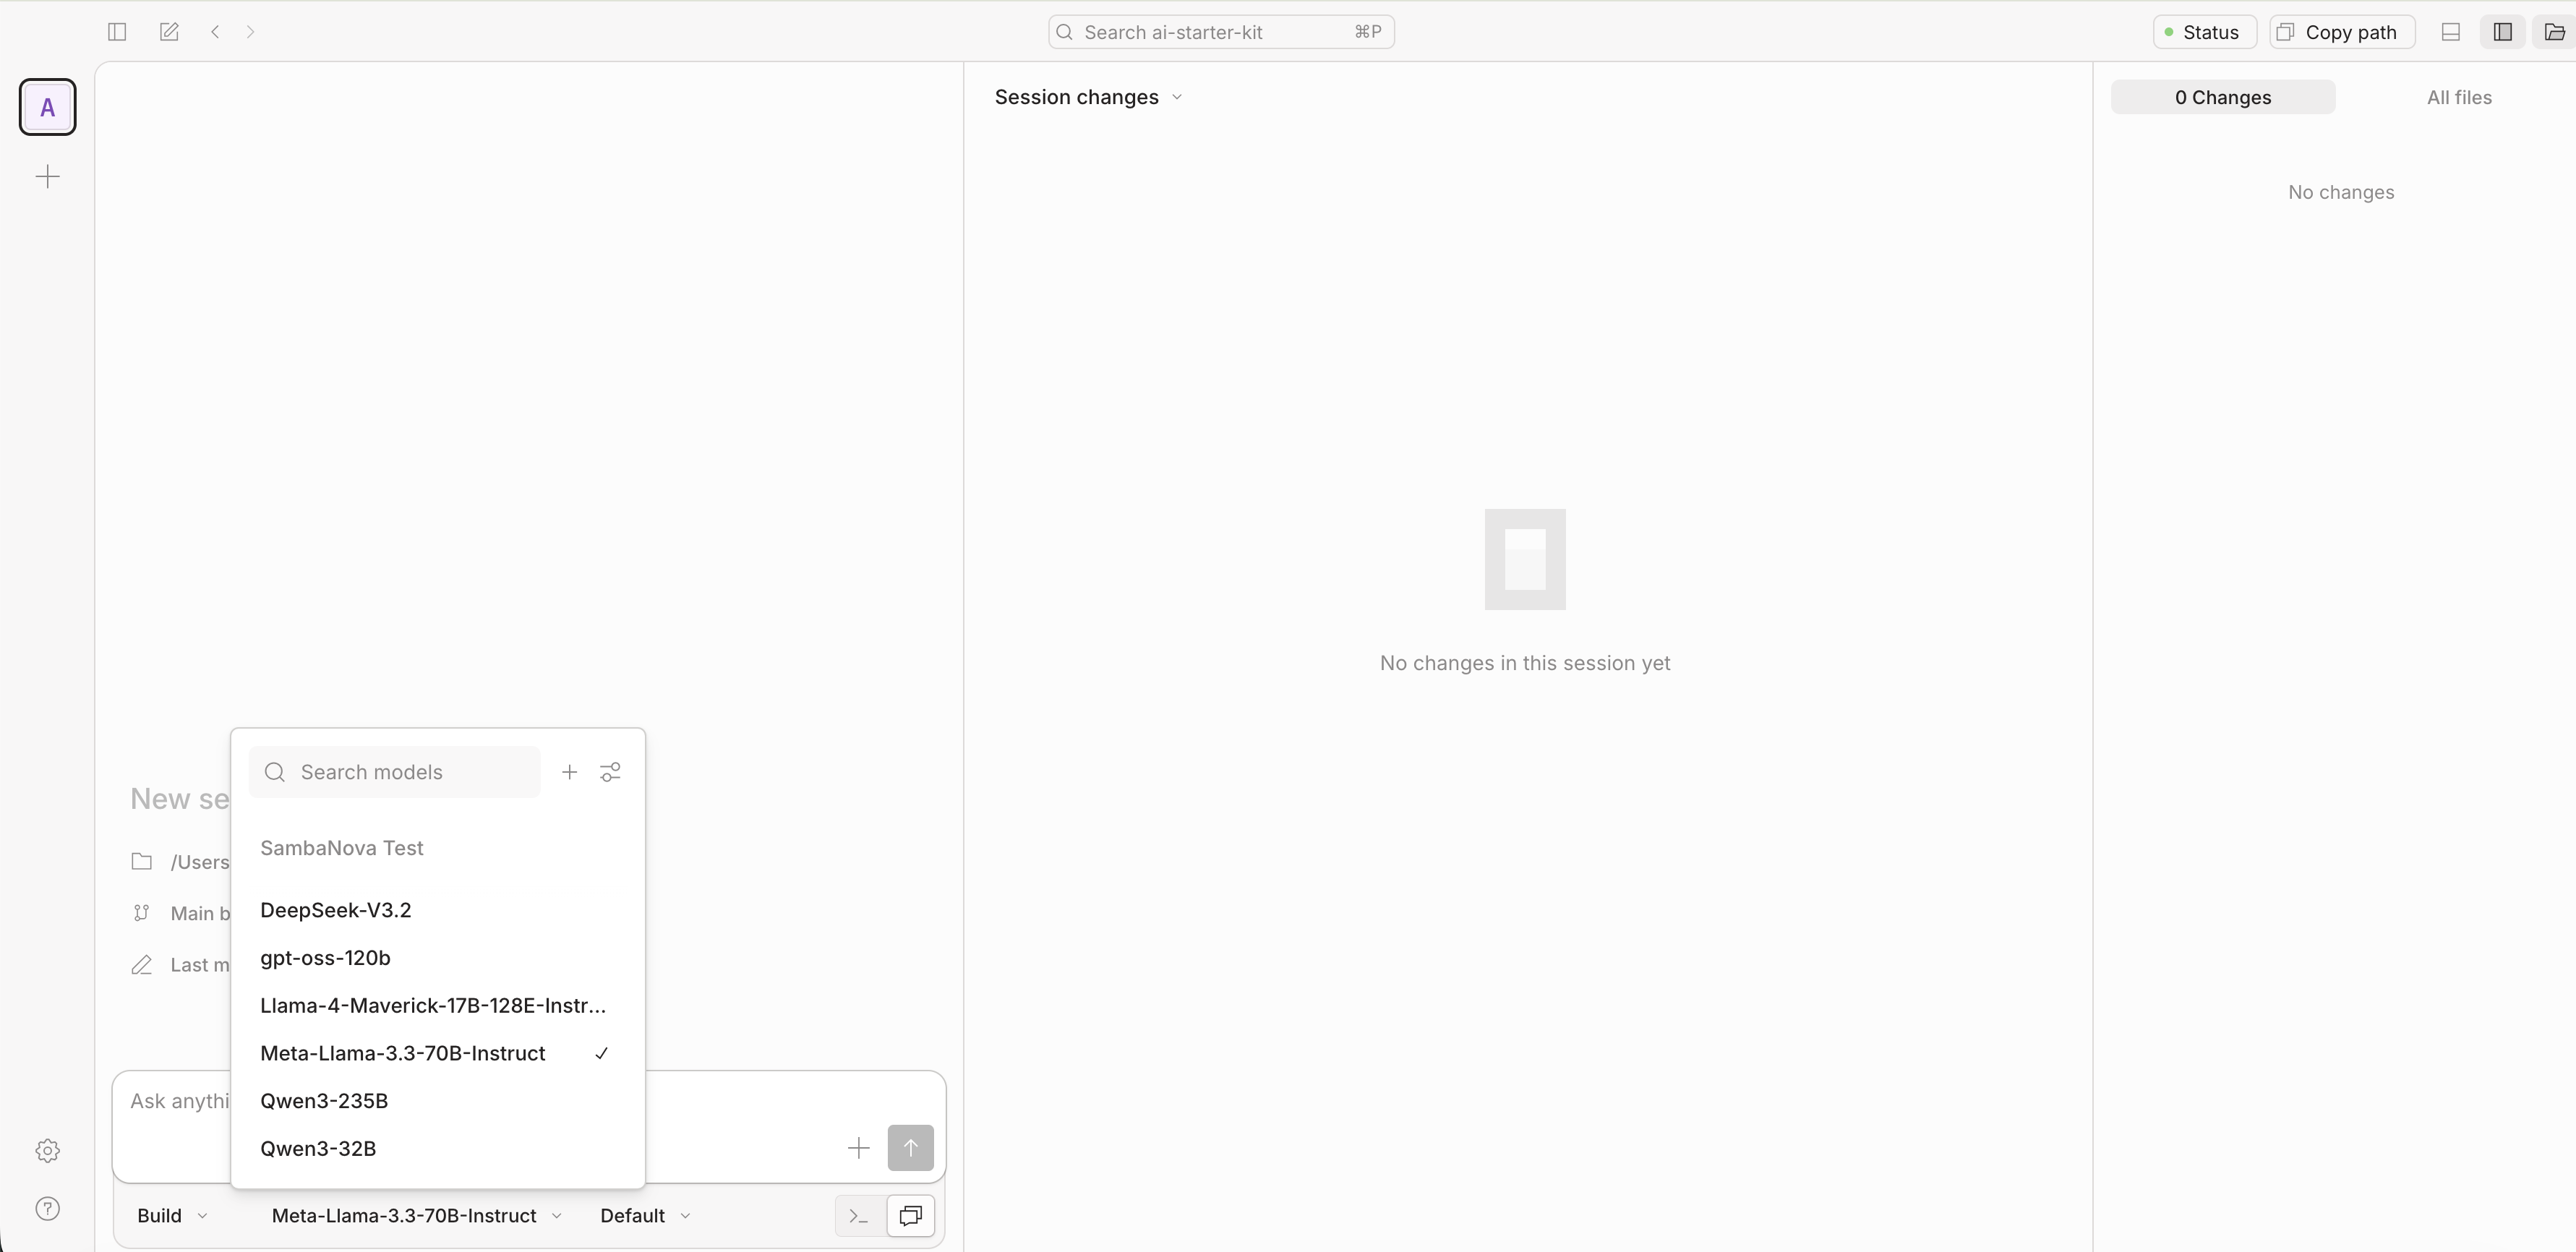
After finishing the configuration, if you want to add more models, modify the
models key in the file ~/.config/opencode/opencode.json:Additional resources
How to use sub-agents in OpenCode with SambaNova
Out of the box, OpenCode ships with two primary agents –plan (read-only / ask-to-edit) and build (full tools) – and you can point each one at a different model. That makes opencode a natural fit for SambaNova’s planner / executor pattern: a frontier reasoning model writes the plan, and MiniMax-M2.7 (fast and cheap) does the 50–200 turns of file edits and test runs.
Prerequisites
- opencode installed:
curl -fsSL https://opencode.ai/install | bash - SambaNova API key exported as
SAMBANOVA_API_KEY. - Anthropic API key exported as
ANTHROPIC_API_KEY– used by the frontier planner in Demos 2 & 3. opencode auto-discovers it from the env when set, so no provider block is needed inopencode.json.
Wire up SambaNova
opencode readsopencode.json from the project root (or ~/.config/opencode/opencode.json globally). Create one demo workspace and drop a config in it:
opencode.json – registers SambaNova as a provider and assigns models to the two built-in agents:
TheLaunch opencode in this folder:@ai-sdk/openai-compatiblepackage talks to SambaNova’s OpenAI-compatible/v1/chat/completionsendpoint.{env:…}substitution keeps the key out of the file. Theanthropic/claude-sonnet-4-6planner is auto-discovered fromANTHROPIC_API_KEY– noprovider.anthropicblock needed. Want a SambaNova-only setup with no frontier dependency? Swap the planner to"sambanova/gemma-4-31B-it".
build and plan – you should see the model name change in the status bar.
Demo 1 – SambaNova end-to-end
A pet-friendly “hello world” landing page, built and verified entirely byMiniMax-M2.7.
Launch opencode in ~/sambanova-opencode-demo and stay in build agent (MiniMax-M2.7). Prompt:
Create a minimalist, pet-friendly “hello world” landing page in this directory. OneVerify:index.html, onestyle.css, no JS frameworks. Soft pastel palette, a friendly paw-print emoji, a short tagline (“Hello, friend”), and a single call-to-action button. Keep it under 80 lines of HTML+CSS combined. Open the file when done so I can preview it.
Demo 2 – Frontier plans, SambaNova executes
The architect/builder split. Plan agent (Claude Sonnet 4.6, per theopencode.json above) writes a precise PLAN.md; build agent (MiniMax-M2.7) executes it. The plan is the artifact that crosses the boundary – reproducible, swappable, reviewable.
Step 1 – switch to plan agent (Tab) and prompt:
ReadReview the plan. Edit it if needed – that’s the point of the artifact. Step 2 – switch toindex.htmlandstyle.cssin this directory. Elaborate a plan describing how to extend this landing page into a “pet adoption finder” demo:Include exact file layout, the JS event handlers needed, and a verification checklist a human can run in the browser. Don’t modify any code yet.
- A gallery of 6 placeholder pet cards (name, species, one-line bio) in CSS grid
- A search input that filters cards by name (vanilla JS, no frameworks)
- A dark-mode toggle that persists in
localStorage
build agent (Tab) and prompt: Since, Build and Plan share the same session, they also share the same historical context, this is why by just pressing Tab transitioning from Plan to Build agent, the builder is capable to complete the following prompt:
Write the plan intoStep 3 – verify:PLAN.mdand proceed with the execution of every step. After each step, list which acceptance criteria from the plan are now satisfied. Openindex.htmlat the end so I can verify in the browser.
PLAN.md and executes it. Tweak PLAN.md and re-run build, or swap the executor model without rewriting the plan.
Demo 3 – MCP-fed planning with live library docs
Demo 2, plus an MCP server. The planner uses Context7 to fetch current docs for a library, bakes them intoPLAN.md, and MiniMax executes. Solves the “model trained on stale docs” problem without writing custom retrieval.
Install Context7
Free API key from context7.com/dashboard, then:mcp key to your existing opencode.json (alongside provider and agent):
/mcps – context7 should show resolve-library-id and query-docs.
No API key works too (free tier, lower rate limits). Drop the headers block.
The task
Stamp each pet card from Demo 2 with a human-readable “Added X days ago” label, computed at page load with date-fns (formatDistanceToNow). date-fns is a good Context7 target: its v2→v3 rewrite changed how it’s imported (tree-shakeable named exports, a new UMD cdn.min.js build) and v4 added time-zone support – so models routinely emit stale default-import patterns that don’t run.
Step 1 – plan agent fetches current docs and writes the plan
Switch to plan:
Use theThe planner callscontext7MCP server to look up current docs for thedate-fnslibrary – specificallyformatDistanceToNowwith theaddSuffixoption, and how to load date-fns in a plain browser page via its UMD CDN build (thedateFnsglobal) vs ESM named imports. Elaborate a plan for “Phase 2: relative date labels” describing how to give each pet card a fixeddata-addedISO date and render an “Added X days ago” label from it on load. Use the up-to-date API from Context7 – not what you remember. Quote the exact<script>CDN tag, the global function call, andaddSuffixusage verbatim from the docs, and include a verification step.
resolve-library-id → query-docs, gets today’s API, and writes a plan grounded in current docs.
Step 2 – build agent executes
Switch to build:
Update PLAN.md to include the “Phase 2” part and execute it. After loading, open index.html and confirm each card shows an “Added X days ago” label.
The executor doesn’t need MCP – PLAN.md already contains the resolved API. MCP access stays on the (more expensive) planner side, where it pays off.
Step 3 – verify
Why this matters
MCP-fed planning keeps the frontier planner well-informed and the SambaNova executor cheap and tool-light. The boundary isPLAN.md.
Tips
- Tab cycles primary agents. Watch the status bar to confirm which model is active.
@plan/@buildin your prompt lets you hand off without switching the active agent.- Tell the executor to verify (“open
index.htmland confirm…”) or it will edit files and stop. - Per-project
opencode.jsonoverrides global config – handy for pinning a SambaNova model on one repo without touching others.
Common gotchas
“Model not found.” opencode model ids areprovider/model – always sambanova/MiniMax-M2.7, never the bare id. The bare id only appears as a key inside provider.sambanova.models.
API key not picked up. {env:SAMBANOVA_API_KEY} is resolved at opencode startup. Export the var in your shell, then launch opencode from that shell – not from a stale tmux pane.
Frontier model can’t be found. opencode auto-discovers Anthropic/OpenAI models when the env key is set; if you use a non-default model id, register it under provider.anthropic.models the same way you registered SambaNova’s.
Composing with MCP servers
opencode’s two agents sit on opposite sides of a useful boundary:
Three patterns fall out:
1. MCP-fed planning. Planner pulls external context (docs, Jira, GitHub), bakes it into
PLAN.md, hands to build.
2. MCP-driven handoff. After build finishes, switch back to plan and use a GitHub or Slack MCP server to open a PR / post a summary – the executor never needs those credentials.
3. Shell-CLI tools inside build. The build agent has bash access. Any CLI on PATH (gh, git, aws, …) is fair game – tell it in the prompt.
References
- opencode docs – opencode.ai/docs
- opencode providers – opencode.ai/docs/providers
- opencode agents – opencode.ai/docs/agents
- SambaNova Cloud – cloud.sambanova.ai
- SambaNova Responses API blog – build faster coding agents
- Context7 MCP – github.com/upstash/context7
- Model Context Protocol – modelcontextprotocol.io