> ## Documentation Index
> Fetch the complete documentation index at: https://sambanova-systems.mintlify.site/docs/llms.txt
> Use this file to discover all available pages before exploring further.
# Quickstart - on-prem
This guide walks you through the basic steps to set up SambaStack on-prem, including authentication, namespace creation, secrets configuration, and Helm deployment.
## Prerequisites
This section outlines the prerequisites for deploying SambaStack and guides you through obtaining the necessary credentials and configurations.
SambaNova collects hardware prerequisites (such as load balancer configuration) and OS configuration requirements (such as NTP servers) through the SambaNova site survey. Contact your SambaNova representative for details.
1. This guide assumes you have a kubernetes cluster already in place.
2. You must provide two TLS certificates and DNS names for the API and UI endpoints:
* `api.` – certificate and private key
* `ui.` – certificate and private key
3. You must provide certificates as either:
* Two individual certificates (one for each hostname), or
* A single wildcard certificate (e.g., `*.example.com`) covering both
Self-signed certificates are not supported for production environments
Certificates must be issued by a trusted Certificate Authority (CA) such as Let’s Encrypt, DigiCert, or your organization’s internal CA
4. Ensure the following tools are installed/present:
* [**Helm**](https://helm.sh/docs/intro/install/)
* [**kubectl**](https://kubernetes.io/docs/tasks/tools/)
* [**Google Cloud CLI (gcloud)**](https://docs.cloud.google.com/sdk/docs/install-sdk) | **Requirement** | **Specification** | | :-- | :-- | | Kubernetes version | v1.30+ (recommended) | | Helm version | v3.19+ (recommended) | | Control planes | Core Services Rack (CSR) includes 3 control planes for SambaStack | | Data planes | SambaRack worker nodes serve as data planes |
5. Make sure you have received the following from SambaNova
1. Helm chart OCI registry URLs
| Chart | Registry URL |
| :-------------- | :------------------------------------------------ |
| SambaStack Base | `oci:///sambastack/sambastack-base` |
| SambaStack | `oci:///sambastack/sambastack` |
SambaNova provides the full registry URL, `service-account-key` file, and version number during handover. Contact your SambaNova representative for access credentials.
Version numbers change with new chart releases. Check with your SambaNova representative for the current installation version.
2. Configuration files
* Sample `sambastack.yaml` file for your deployment - this guide also shows how to build this from scratch.
3. Google Cloud service account key file. This file is used to create:
* Image Pull Secret
* Artifact reader secret
## Setup
1. Create sambastack namespace
```shellscript theme={null}
kubectl create namespace sambastack
```
2. Create a Docker registry secret for pulling images from Artifact Registry using your Google Cloud service account JSON key:
```shellscript theme={null}
kubectl create secret docker-registry regcred \
--docker-server=us-docker.pkg.dev \
--docker-username=_json_key \
--docker-password="$(cat .json)" \
--namespace sambastack
```
3. Create a secret for reading model artifacts from Google Cloud Storage:
```shellscript theme={null}
kubectl create secret generic sambanova-artifact-reader \
--from-file=GOOGLE_APPLICATION_CREDENTIALS=.json \
--namespace sambastack
```
4. Label each RDU node for scheduling. Add `--overwrite` for idempotency:
```shellscript theme={null}
kubectl label nodes snRduArch=sn40-16 --overwrite
```
Repeat this command for each node in your cluster.
1. Configure a minimum viable `sambastack.yaml` file:
```yaml theme={null}
gateway:
replicas: 3
ingress:
hosts:
- host: api.
tlsSecretName: tls-cert
cloud-ui:
replicas: 3
ingress:
hosts:
- host: ui.
tlsSecretName: tls-cert
bundles:
bundleSpecs:
- name: gpt-oss-120b-8-32-64-128k
bundleDeploymentSpecs:
- name: gpt-oss-120b-8-32-64-128k
groups:
- name: default
minReplicas: 1
qosList: [web, free]
global:
extraEnv:
- name: "DDR_PER_RDU_GB"
value: "256"
```
This default file deploys a bundle that you will be able to query by including entries under the `bundles.bundleSpecs` and `bundles.bundleDeploymentSpecs` sections.
SambaRack SN40L-16 systems may have either 12TB or 4TB of DDR memory, but all newly shipped systems are 4TB, so configure the cluster memory limit accordingly and use the lower limit when mixing node types.
See the [SambaStack.yaml Reference](/en/v1.2.0/sambastack/resources/sambastack-yaml) for a full example.
1. Use your Google Cloud service account to authenticate with the Helm registry:
```shellscript theme={null}
export GOOGLE_APPLICATION_CREDENTIALS=""
gcloud auth activate-service-account --key-file="$GOOGLE_APPLICATION_CREDENTIALS"
helm registry login -u oauth2accesstoken -p "$(gcloud auth print-access-token)" us-docker.pkg.dev
```
2. Install the base chart and main SambaStack chart:
```shellscript theme={null}
helm upgrade \
--install \
--namespace sambastack \
--version \
sambastack-base \
oci:///sambastack/sambastack-base
helm upgrade \
--install \
--namespace sambastack \
--version \
sambastack \
-f sambastack.yaml \
oci:///sambastack/sambastack
```
SambaNova provides the full registry URL and version number during handover. Contact your SambaNova representative for access credentials.
Version numbers change with new chart releases. Use the version number provided by your SambaNova representative.
Refer to the [**Pods reference**](/en/v1.2.0/sambastack/resources/pods-reference) table for details on the pods created after installation.
1. Run the following command to see all the pods running in your cluster:
```shellscript theme={null}
kubectl -n sambastack get pods
```
2. Make sure all pods are `Running`. Your response should resemble the following:
```text theme={null}
NAME READY STATUS RESTARTS AGE
auth-and-billing-5f7f9cc8db-4mlnx 2/2 Running 0 20m
auth-and-billing-5f7f9cc8db-lmts8 2/2 Running 0 20m
auth-and-billing-5f7f9cc8db-rztfp 2/2 Running 0 20m
cloud-ui-76d458db46-2k2ws 1/1 Running 0 20m
cloud-ui-76d458db46-2z7jd 1/1 Running 0 20m
cloud-ui-76d458db46-rsx4p 1/1 Running 0 20m
db-admin-5b8c7fc5b4-5lvl4 2/2 Running 0 20m
debug-pod 1/1 Running 0 20m
gateway-7464677785-7kpvf 4/4 Running 0 20m
gateway-7464677785-cm47v 4/4 Running 0 20m
gateway-7464677785-kntm8 4/4 Running 0 20m
inf-gpt-oss-120b-8-32-64-128k-cache-0 1/1 Running 0 20m
inf-gpt-oss-120b-8-32-64-128k-q-default-n-0 2/2 Running 0 20m
inf-operator-0 1/1 Running 0 20m
inference-router-77c7cccd5b-dkxzc 1/1 Running 0 20m
keycloak-0 1/1 Running 0 20m
keycloak-operator-574d46bf79-wh8fr 1/1 Running 0 20m
sambastack-cloudnative-pg-cff97c7c5-fxznp 1/1 Running 0 20m
sambastack-global-queue-redis-master-0 2/2 Running 0 20m
sambastack-localpv-provisioner-77558bf687-dsqnr 1/1 Running 0 20m
sambastack-postgres-1 1/1 Running 0 20m
sambastack-postgres-2-join-l7scz 1/1 Running 0 20m
sambastack-response-queue-redis-master-0 2/2 Running 0 20m
```
It usually takes about 5-10 minutes for all the pods to reach their desired `Running` state.
See the [**Pods reference**](/en/v1.2.0/sambastack/resources/pods-reference) table for more details.
This quickstart guide uses the default keycloak auth setup to get started. To configure custom authentication, check out the [authentication page](/en/v1.2.0/sambastack/service-administration/authentication).
1. Retrieve keycloak `temp-admin` credentials:
```shellscript wrap theme={null}
kubectl -n sambastack get secret keycloak-initial-admin -o go-template='username: {{.data.username | base64decode}} password: {{.data.password | base64decode}}'
```
2. Port forward keycloak
```shellscript theme={null}
kubectl -n sambastack port-forward svc/keycloak-service 8080
```
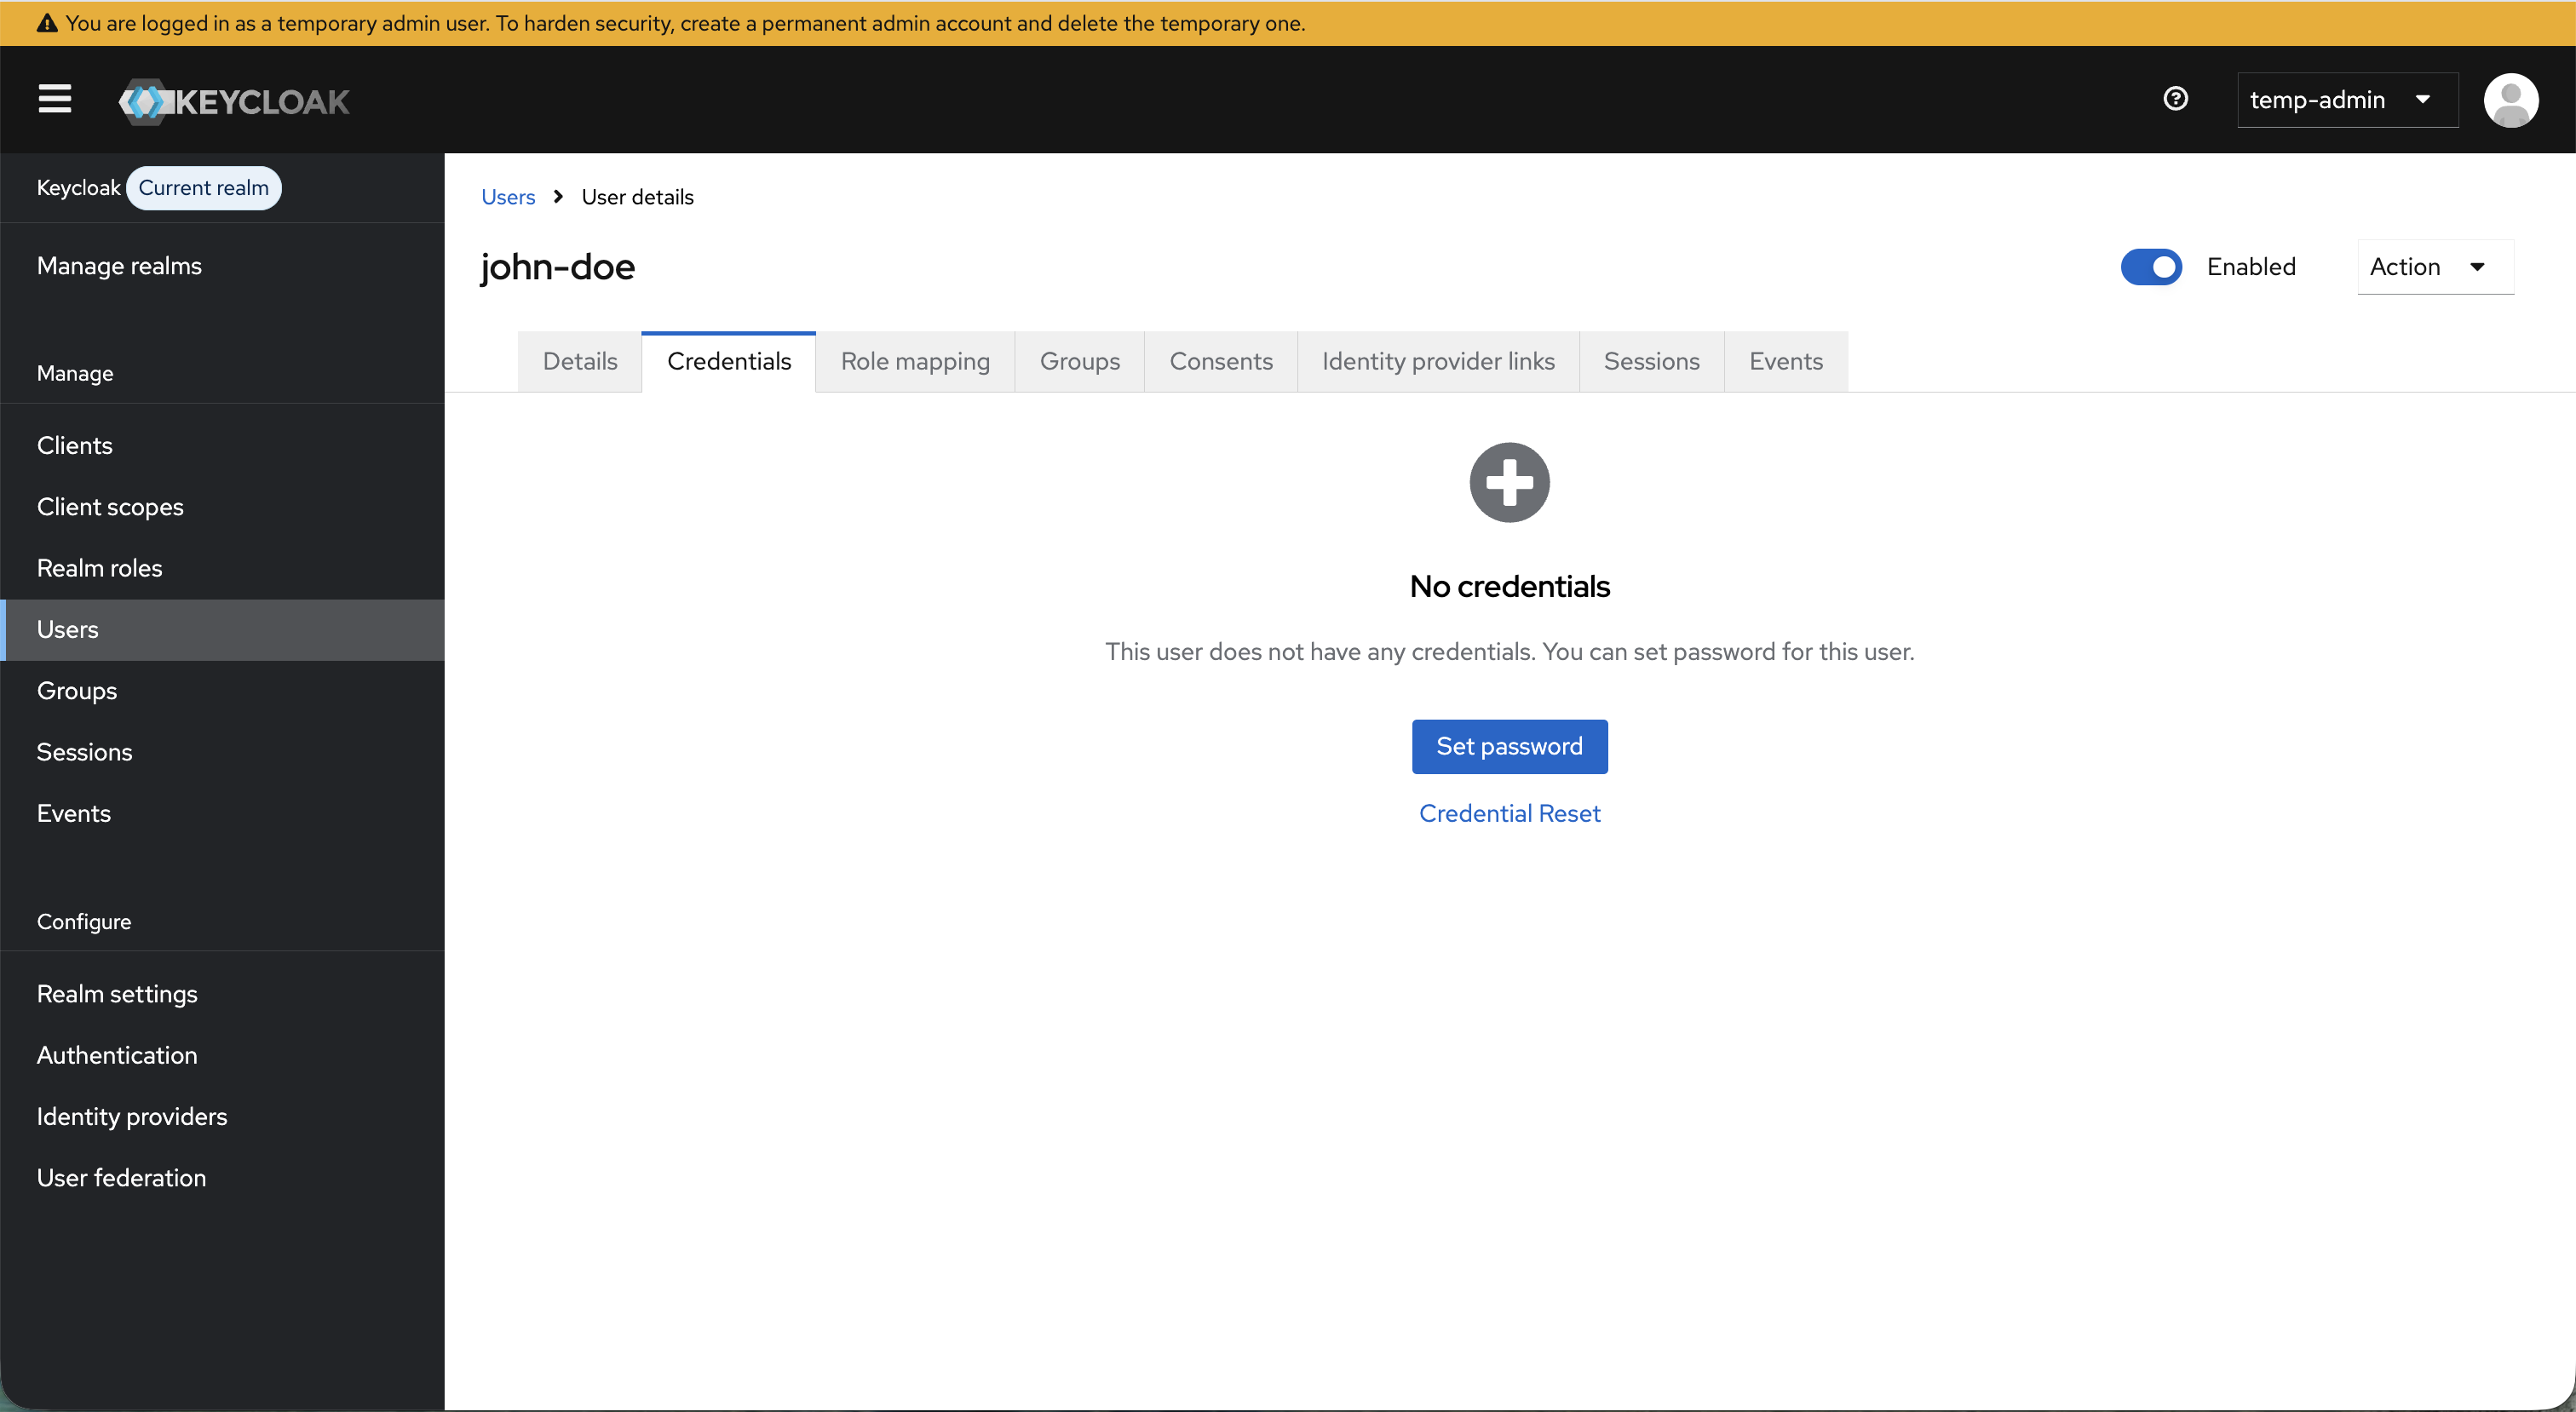
3. Log into keycloak at `http://localhost:8080/` with `temp-admin` credentials above. 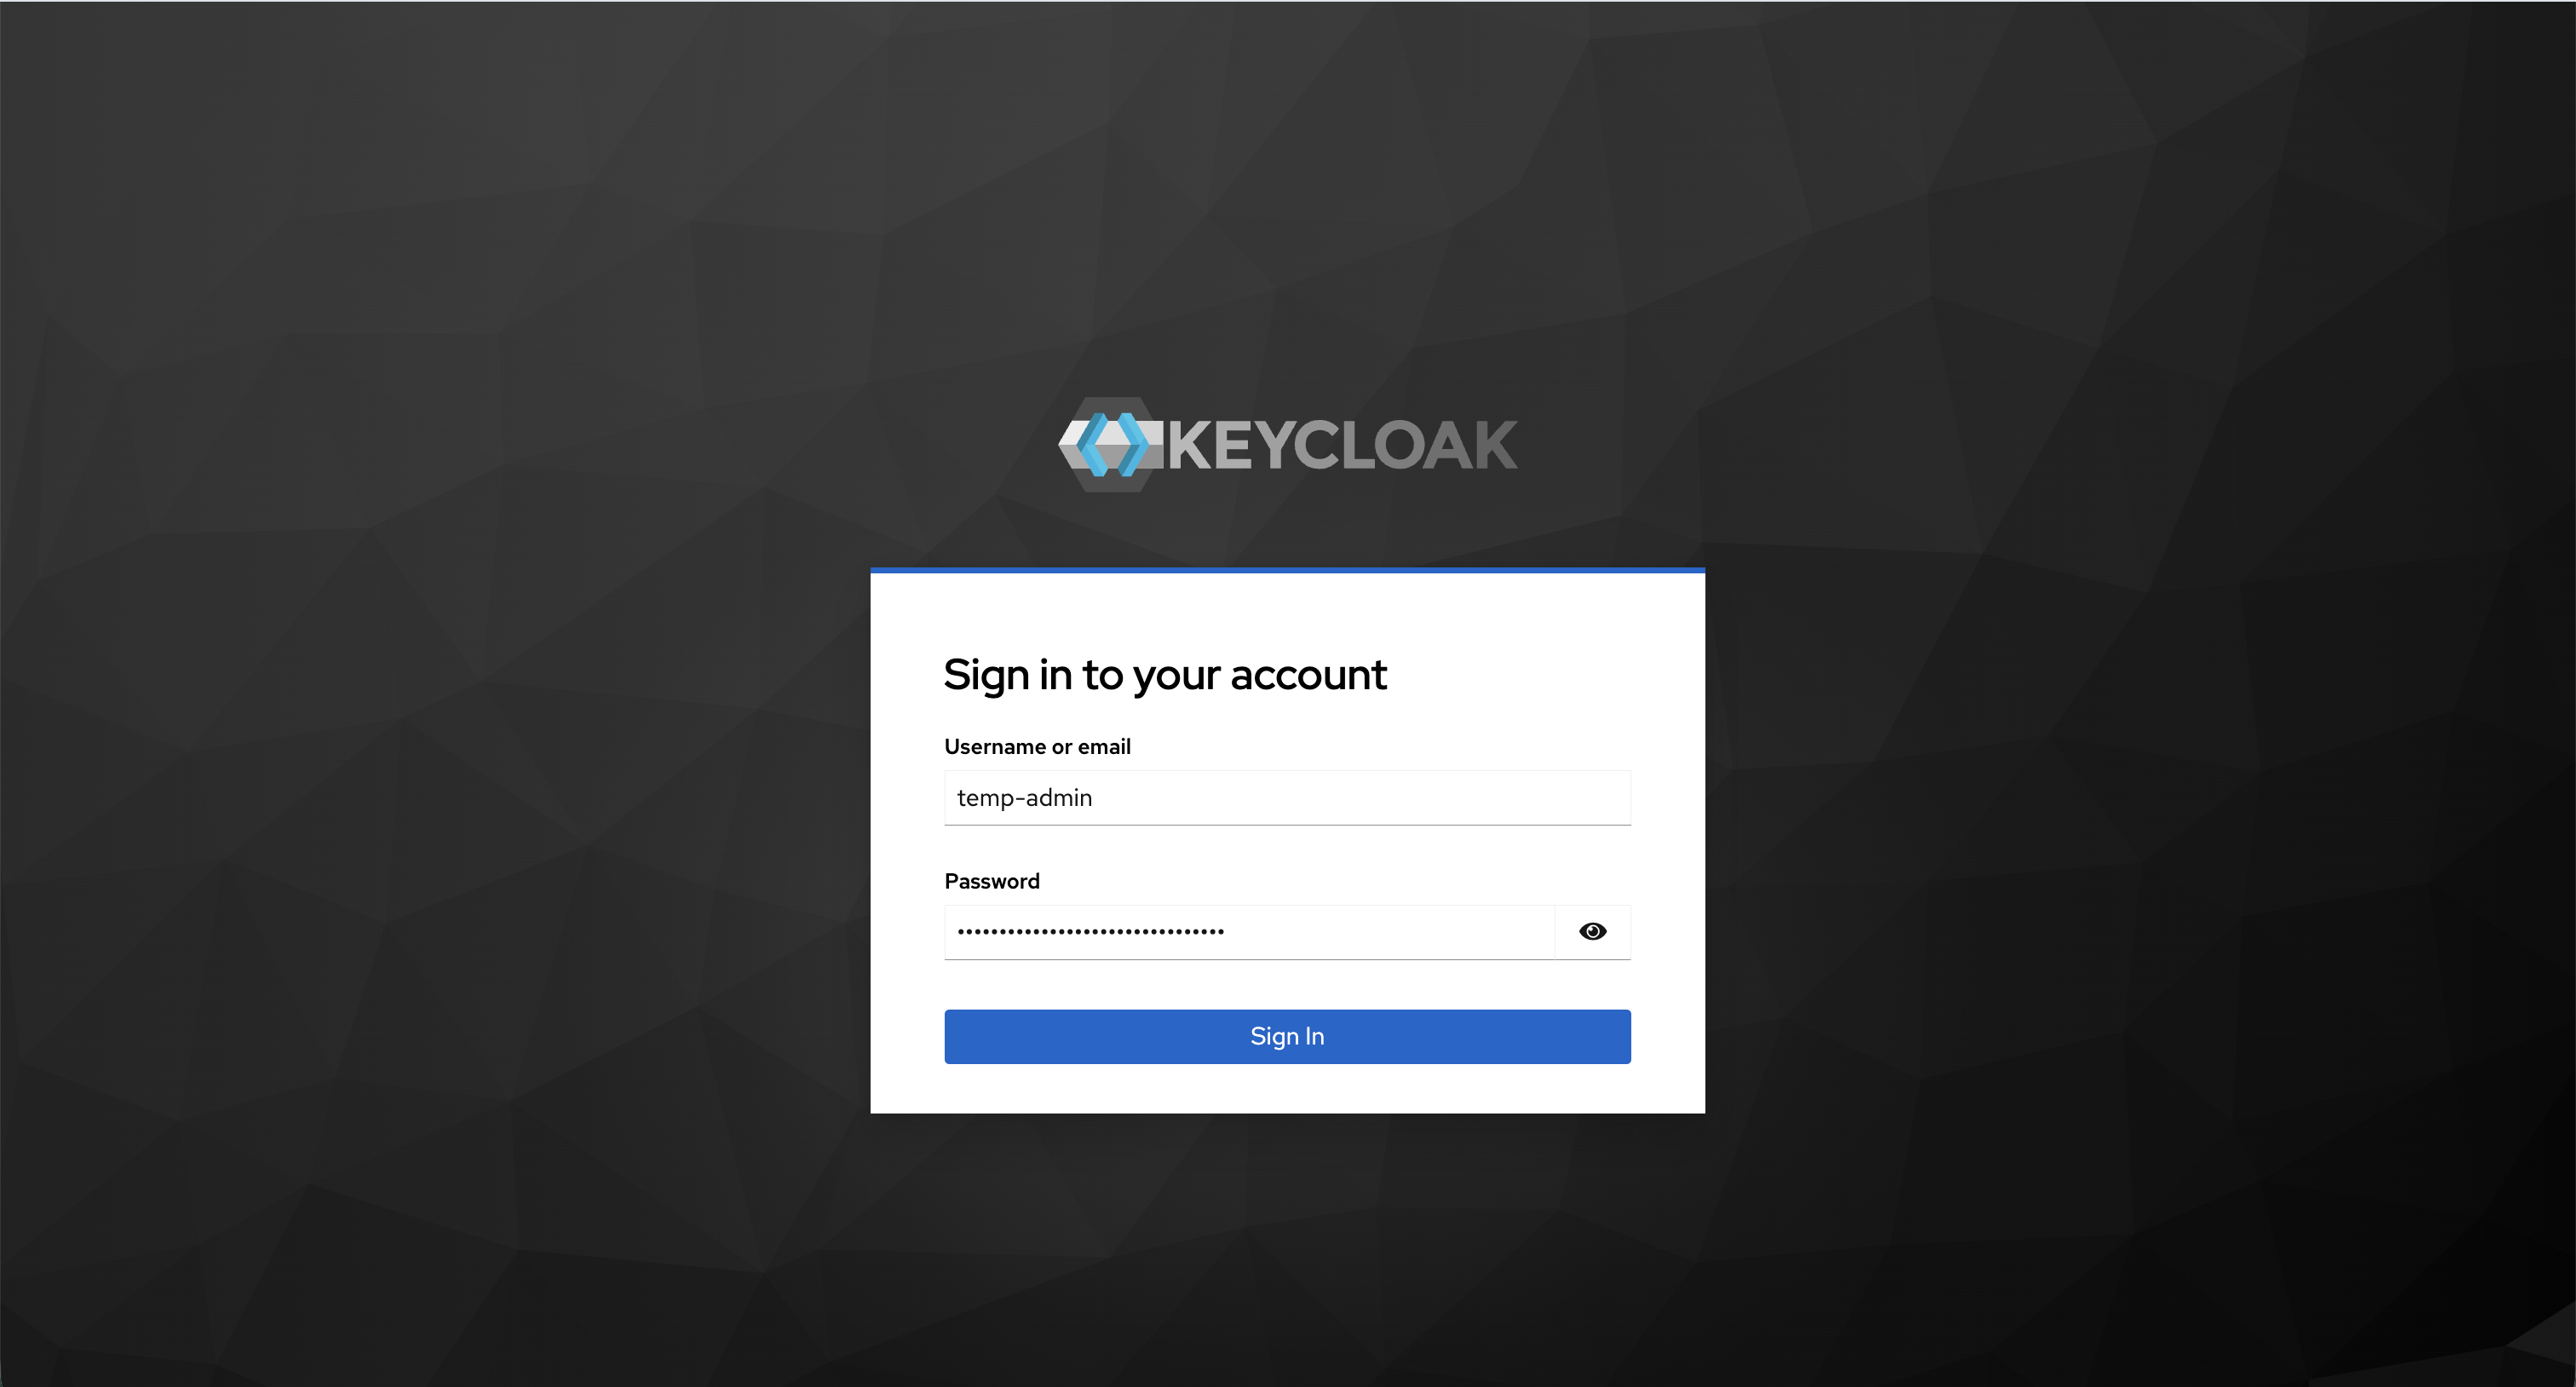 4. Create admin user
 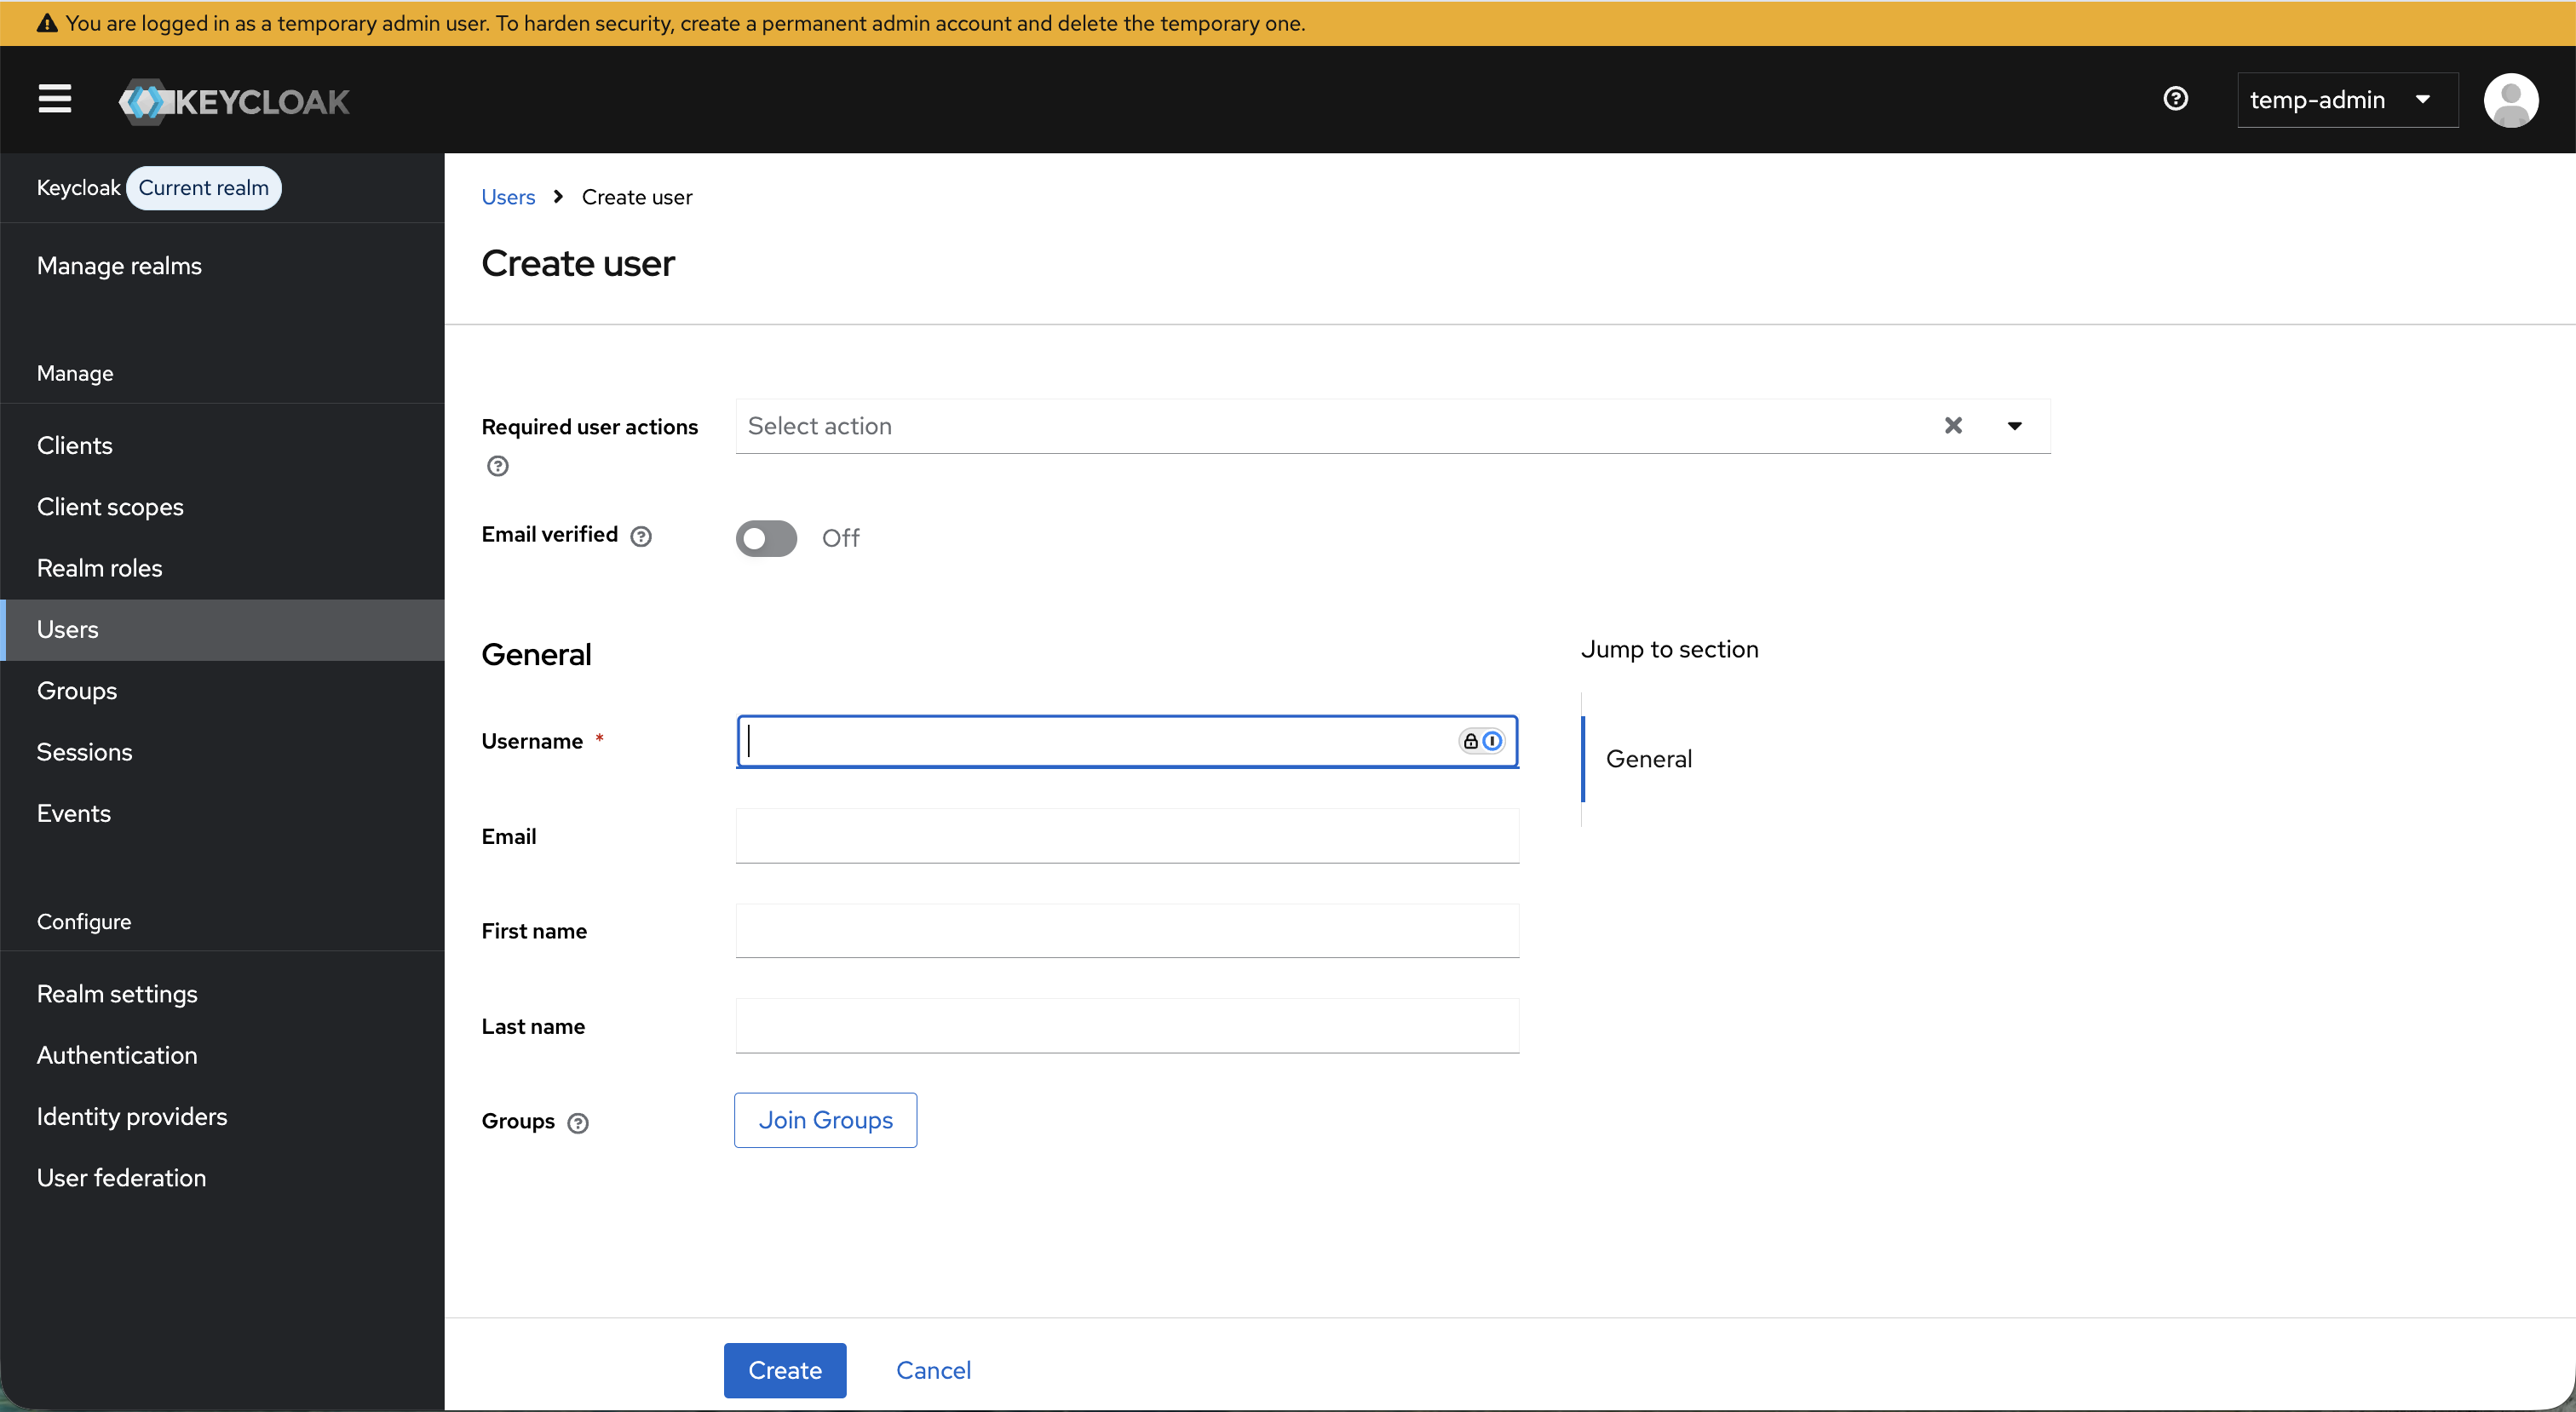 5. Assign admin role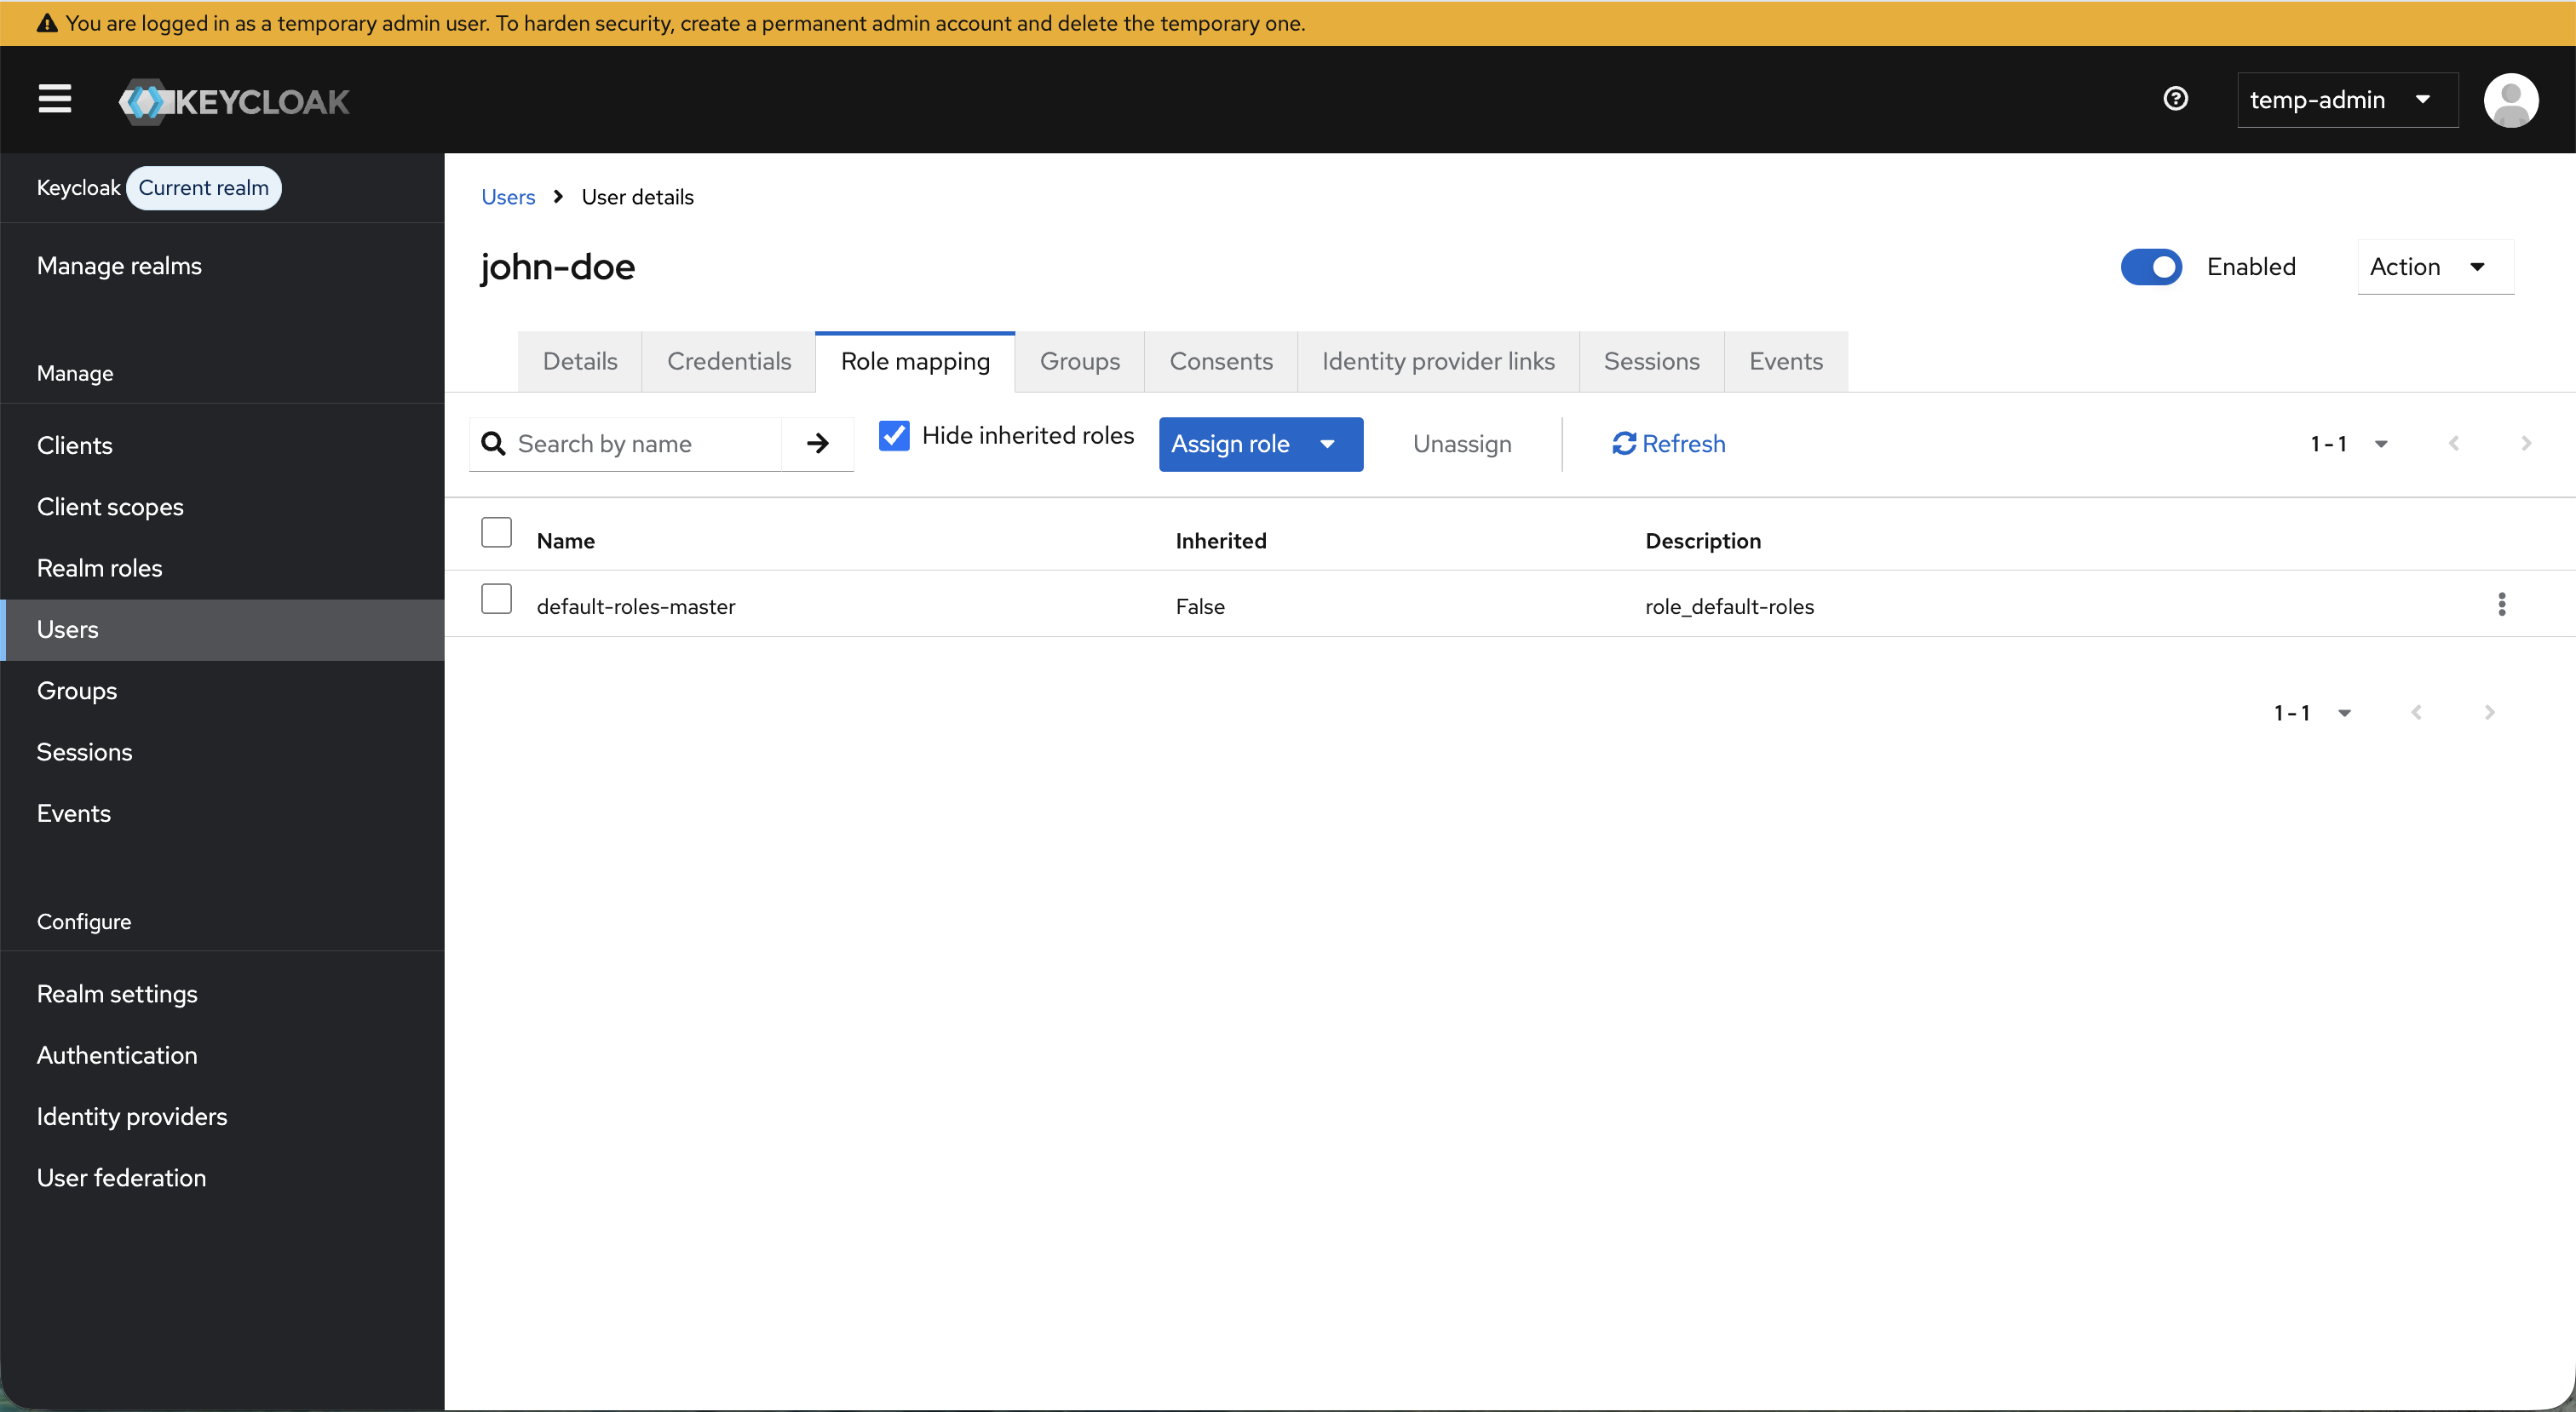
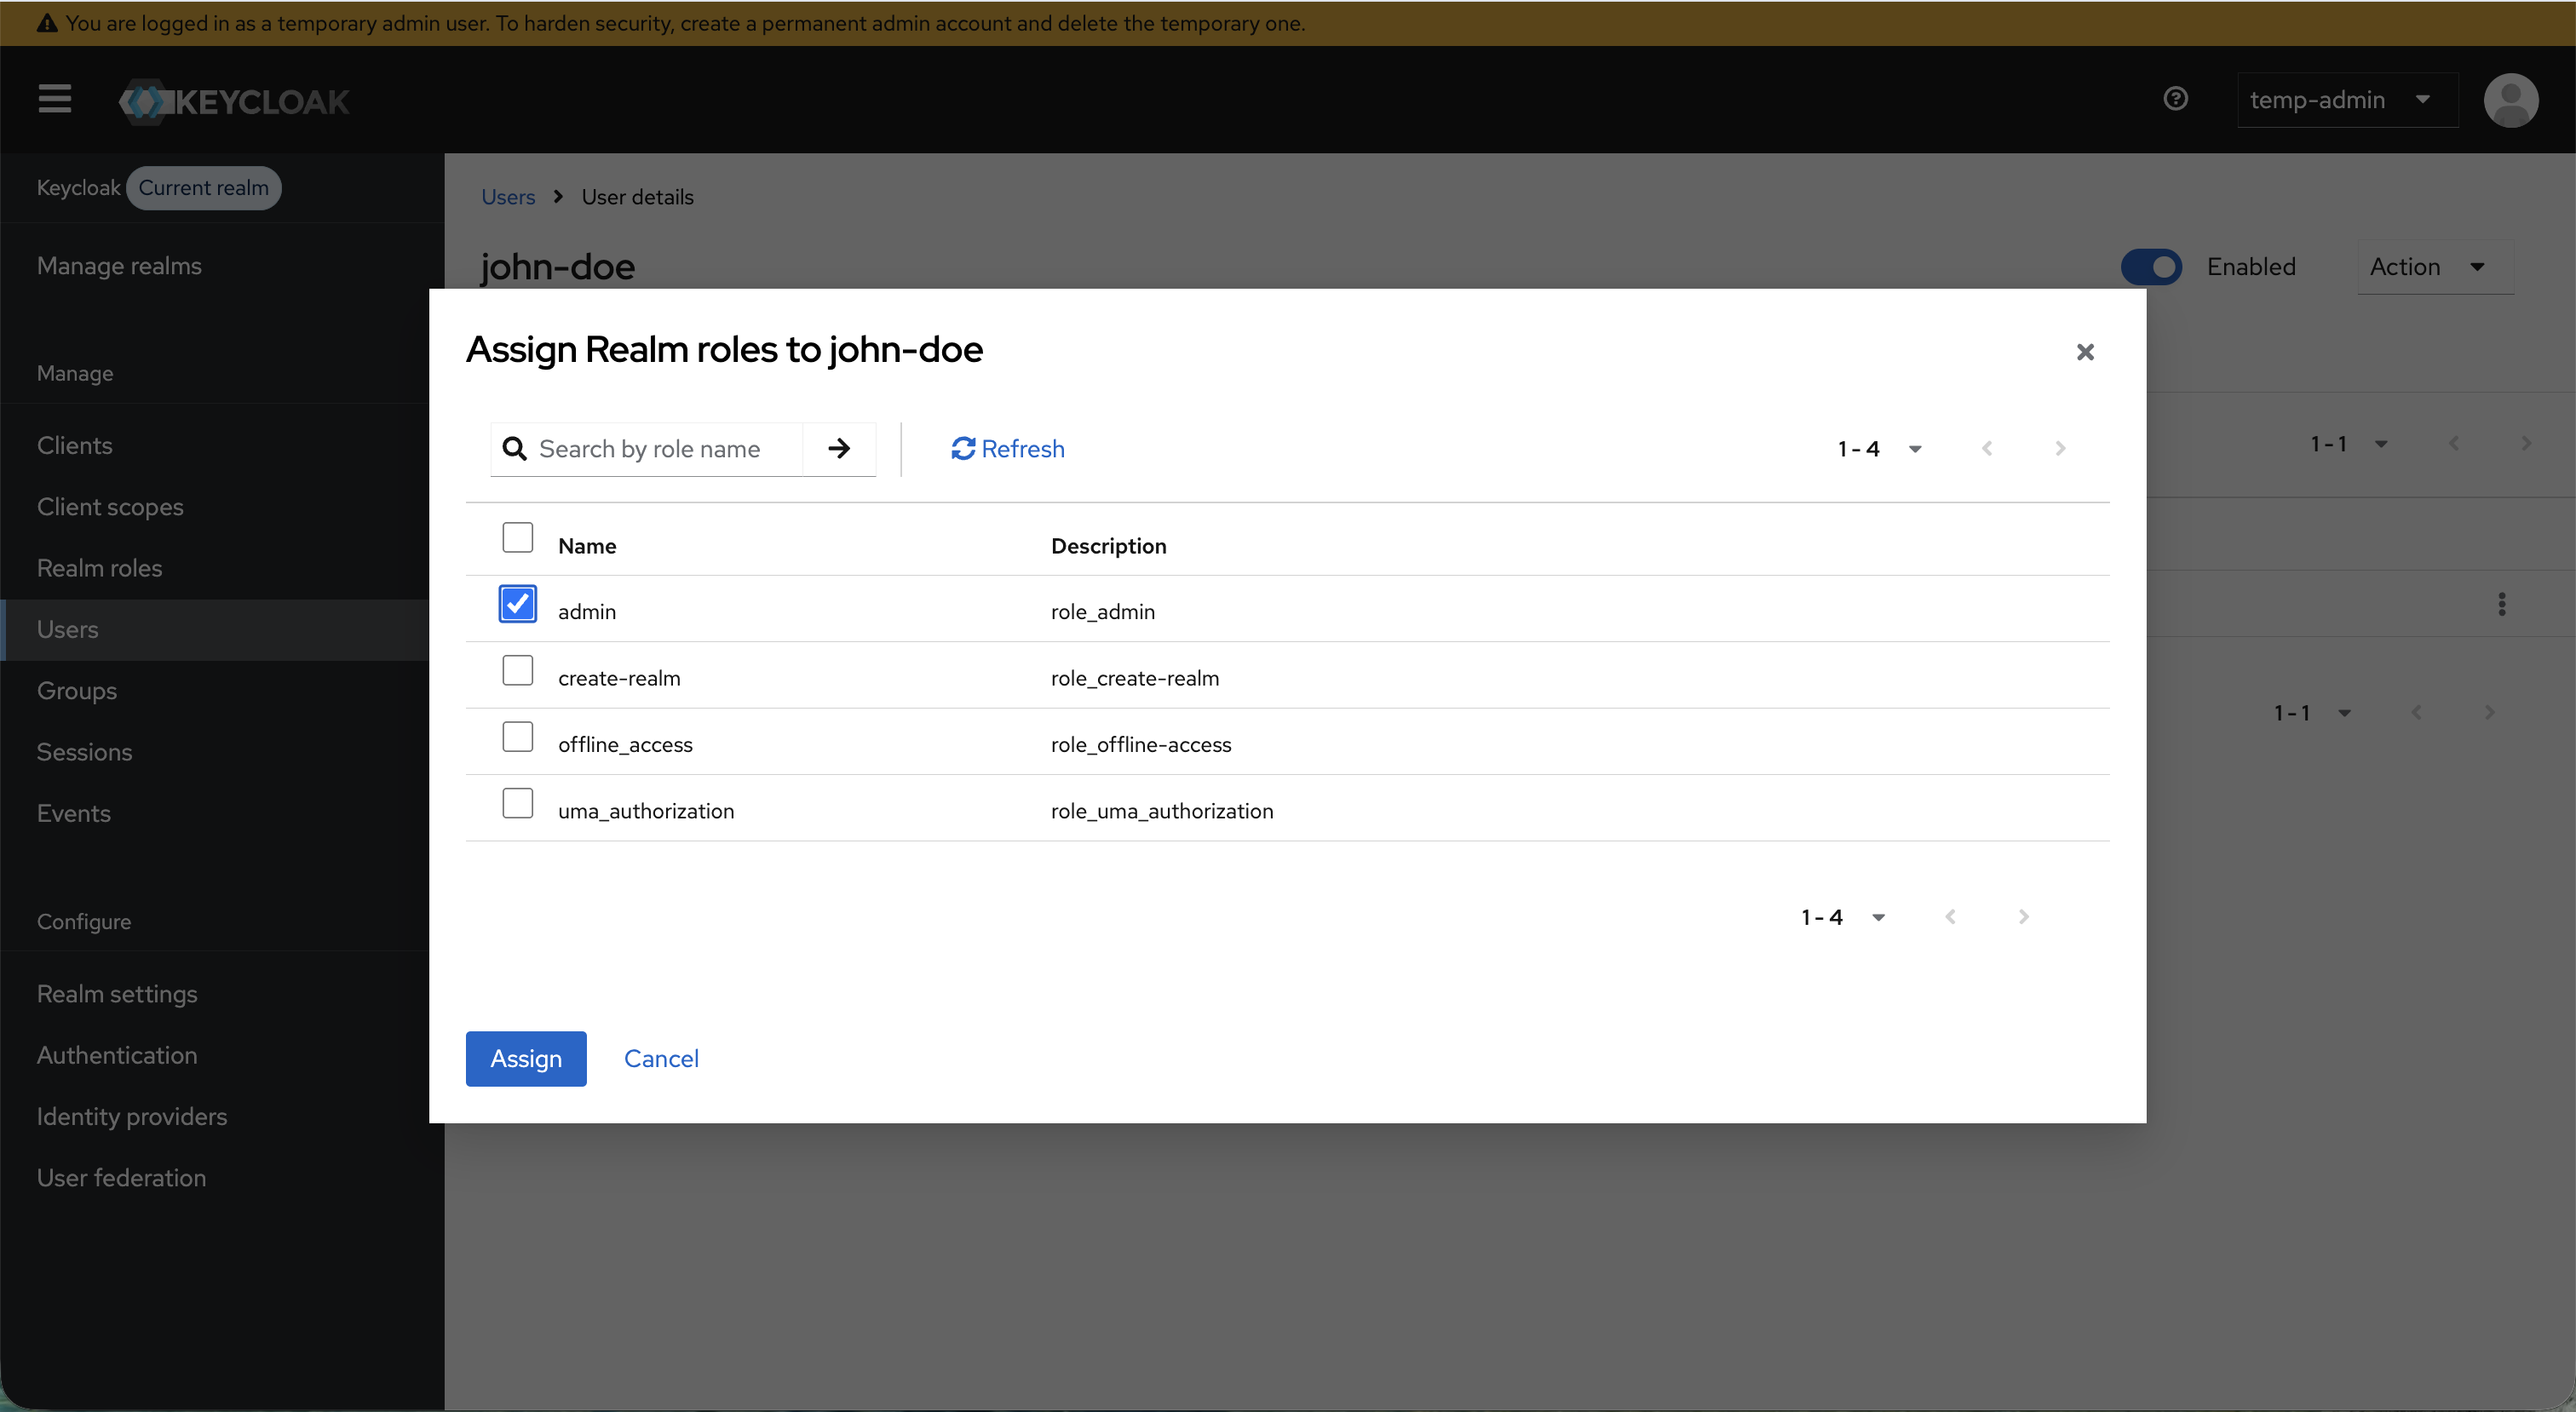 6. Set admin credentials
  7. Add admin user email to the `db-admin` section of `sambastack.yaml`:
```yaml theme={null}
db-admin:
admins:
- temp-admin@cluster.local
-
```
See the [SambaStack.yaml Reference](/en/v1.2.0/sambastack/resources/sambastack-yaml) for a full example.
8. Visit `ui.` and log in with user credentials retrieved above.
7. Add admin user email to the `db-admin` section of `sambastack.yaml`:
```yaml theme={null}
db-admin:
admins:
- temp-admin@cluster.local
-
```
See the [SambaStack.yaml Reference](/en/v1.2.0/sambastack/resources/sambastack-yaml) for a full example.
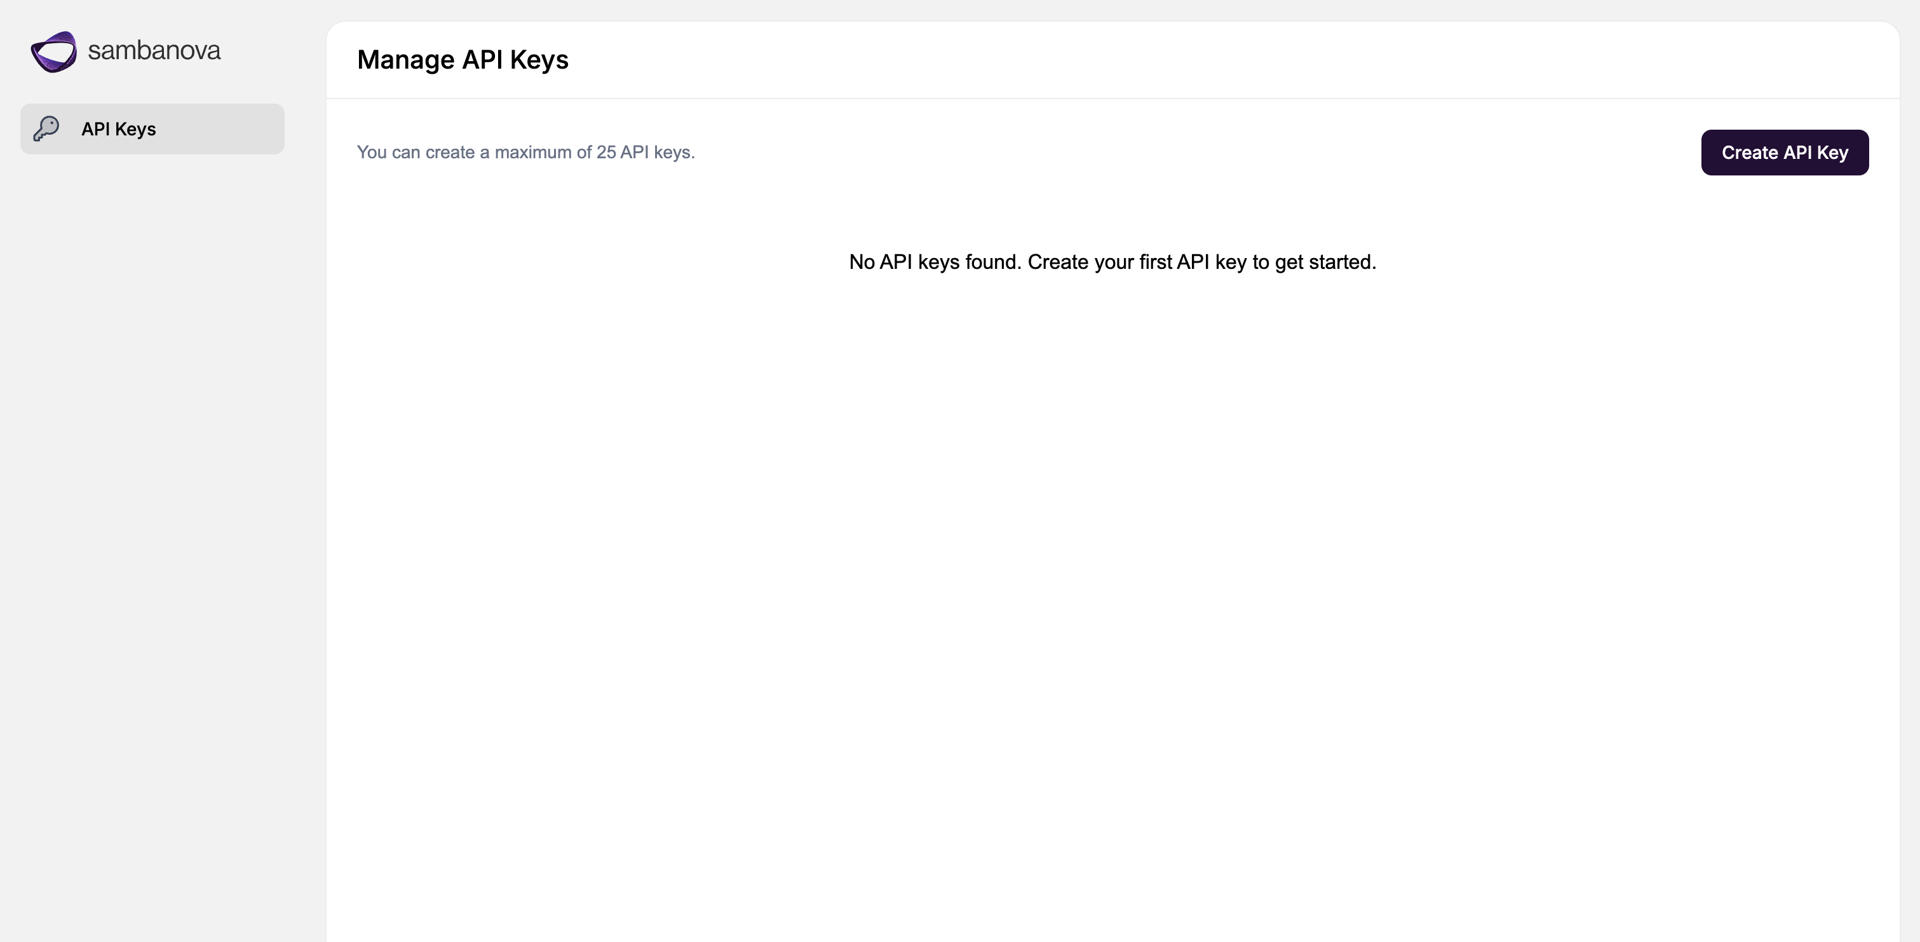
8. Visit `ui.` and log in with user credentials retrieved above. 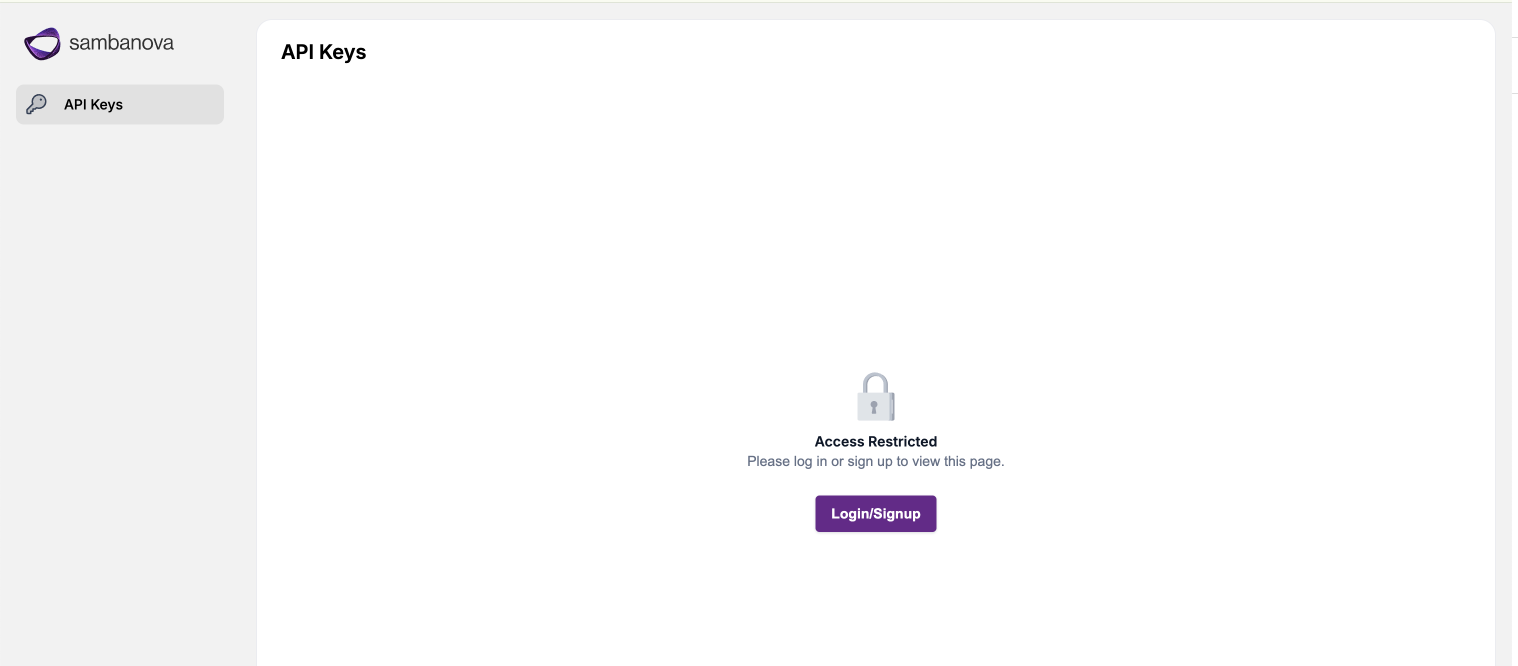 9. Create API key and save securely:
  1. Set your API key:
```shellscript theme={null}
export SAMBANOVA_API_KEY=''
```
2. Run a test query against the deployed model bundle with either cURL or a python script:
Run the following cURL command
```shellscript theme={null}
curl https://api./v1/chat/completions \
-H "Authorization: Bearer $SAMBANOVA_API_KEY" \
-H "Content-Type: application/json" \
-d '{
"model": "gpt-oss-120b",
"messages": [
{"role": "system", "content": "You are a concise assistant."},
{"role": "user", "content": "Say hi in one sentence and comment on the weather."}
],
"temperature": 0.2,
"max_tokens": 128,
"stream": false
}'
```
Your response should resemble the following:
```json theme={null}
{
"choices": [
{
"finish_reason": "stop",
"index": 0,
"logprobs": null,
"message": {
"content": "Hi there, it's a sunny day today!",
"reasoning": "The user wants a short response: \"Say hi in one sentence and comment on the weather.\" So we need to produce a single sentence that says hi and comments on the weather. Must be concise. So something like \"Hi there! It's a sunny day today.\" That's two sentences. Need one sentence. Could be \"Hi there–it's a sunny day today!\" That's one sentence with dash. Or \"Hi there, it's a sunny day today!\" That's one sentence with comma. That works. Provide that.",
"role": "assistant"
}
}
],
"created": 1770927918,
"id": "c754b468-05e1-4fe4-8a28-f51ecc74f4f2",
"model": "gpt-oss-120b",
"object": "chat.completion",
"system_fingerprint": "fastcoe",
"usage": {
"completion_tokens": 121,
"completion_tokens_after_first_per_sec": 500.6027126944832,
"completion_tokens_after_first_per_sec_first_ten": 502.05732024083596,
"completion_tokens_after_first_per_sec_graph": 502.05732024083596,
"completion_tokens_per_sec": 413.56225915094006,
"end_time": 1770927918.2348678,
"is_last_response": true,
"prompt_tokens": 91,
"prompt_tokens_details": {
"cached_tokens": 0
},
"start_time": 1770927917.942288,
"stop_reason": "stop",
"time_to_first_token": 0.05286884307861328,
"time_to_first_token_graph": 0.05082893371582031,
"total_latency": 0.29257988929748535,
"total_tokens": 212,
"total_tokens_per_sec": 724.5884209917298
}
}
```
Create a python script to run the following program. Make sure to insert your correct api domain name.
```python theme={null}
import os
from sambanova import SambaNova
api_key = os.environ.get("SAMBANOVA_API_KEY")
client = SambaNova(
api_key=api_key,
base_url="https://api./v1",
)
try:
response = client.chat.completions.create(
model="gpt-oss-120b",
messages=[
{"role": "system", "content": "You are a concise assistant."},
{"role": "user", "content": "Say hi in one sentence and comment on the weather."}
],
temperature=0.2,
)
print(response.choices[0].message.content)
except Exception as e:
print(f"An error occurred: {e}")
```
Your response should resemble the following:
```text theme={null}
Hi, it's a sunny day today!
```
## Next steps
Congrats! You've set up your SambaStack cluster to a baseline running state. At this point, what you configure next depends on your goals. The following is a list of common configurations you can set up next:
* [Deploy a new bundle](/en/v1.2.0/sambastack/service-administration/deploying-model-bundles)
* [Set up custom OIDC auth](/en/v1.2.0/sambastack/service-administration/authentication)
* [Service Tiers & Rate Limiting](/en/v1.2.0/sambastack/service-administration/usergroup-management)
* [Set up a Monitoring & Observability Stack](/en/v1.2.0/sambastack/reference-architecture/observability/overview)
1. Set your API key:
```shellscript theme={null}
export SAMBANOVA_API_KEY=''
```
2. Run a test query against the deployed model bundle with either cURL or a python script:
Run the following cURL command
```shellscript theme={null}
curl https://api./v1/chat/completions \
-H "Authorization: Bearer $SAMBANOVA_API_KEY" \
-H "Content-Type: application/json" \
-d '{
"model": "gpt-oss-120b",
"messages": [
{"role": "system", "content": "You are a concise assistant."},
{"role": "user", "content": "Say hi in one sentence and comment on the weather."}
],
"temperature": 0.2,
"max_tokens": 128,
"stream": false
}'
```
Your response should resemble the following:
```json theme={null}
{
"choices": [
{
"finish_reason": "stop",
"index": 0,
"logprobs": null,
"message": {
"content": "Hi there, it's a sunny day today!",
"reasoning": "The user wants a short response: \"Say hi in one sentence and comment on the weather.\" So we need to produce a single sentence that says hi and comments on the weather. Must be concise. So something like \"Hi there! It's a sunny day today.\" That's two sentences. Need one sentence. Could be \"Hi there–it's a sunny day today!\" That's one sentence with dash. Or \"Hi there, it's a sunny day today!\" That's one sentence with comma. That works. Provide that.",
"role": "assistant"
}
}
],
"created": 1770927918,
"id": "c754b468-05e1-4fe4-8a28-f51ecc74f4f2",
"model": "gpt-oss-120b",
"object": "chat.completion",
"system_fingerprint": "fastcoe",
"usage": {
"completion_tokens": 121,
"completion_tokens_after_first_per_sec": 500.6027126944832,
"completion_tokens_after_first_per_sec_first_ten": 502.05732024083596,
"completion_tokens_after_first_per_sec_graph": 502.05732024083596,
"completion_tokens_per_sec": 413.56225915094006,
"end_time": 1770927918.2348678,
"is_last_response": true,
"prompt_tokens": 91,
"prompt_tokens_details": {
"cached_tokens": 0
},
"start_time": 1770927917.942288,
"stop_reason": "stop",
"time_to_first_token": 0.05286884307861328,
"time_to_first_token_graph": 0.05082893371582031,
"total_latency": 0.29257988929748535,
"total_tokens": 212,
"total_tokens_per_sec": 724.5884209917298
}
}
```
Create a python script to run the following program. Make sure to insert your correct api domain name.
```python theme={null}
import os
from sambanova import SambaNova
api_key = os.environ.get("SAMBANOVA_API_KEY")
client = SambaNova(
api_key=api_key,
base_url="https://api./v1",
)
try:
response = client.chat.completions.create(
model="gpt-oss-120b",
messages=[
{"role": "system", "content": "You are a concise assistant."},
{"role": "user", "content": "Say hi in one sentence and comment on the weather."}
],
temperature=0.2,
)
print(response.choices[0].message.content)
except Exception as e:
print(f"An error occurred: {e}")
```
Your response should resemble the following:
```text theme={null}
Hi, it's a sunny day today!
```
## Next steps
Congrats! You've set up your SambaStack cluster to a baseline running state. At this point, what you configure next depends on your goals. The following is a list of common configurations you can set up next:
* [Deploy a new bundle](/en/v1.2.0/sambastack/service-administration/deploying-model-bundles)
* [Set up custom OIDC auth](/en/v1.2.0/sambastack/service-administration/authentication)
* [Service Tiers & Rate Limiting](/en/v1.2.0/sambastack/service-administration/usergroup-management)
* [Set up a Monitoring & Observability Stack](/en/v1.2.0/sambastack/reference-architecture/observability/overview)